Introduction: Strawberry Sponge Cake is the kind of dessert that just screams summer — light, airy, and bursting with sweet berry goodness. This isn’t your average heavy, sugary cake that leaves you ready for a nap. Nope, this Strawberry Sponge Cake feels like biting into a fluffy cloud with a hint of sunshine. The base is a soft sponge, so moist and spongy it practically melts in your mouth.
Add a glossy, homemade strawberry filling and a whipped cream cheese frosting that’s both tangy and smooth, and you’ve got a dessert that balances indulgence with freshness. If you’ve ever wanted a dessert that looks impressive but feels effortless, this Strawberry Sponge Cake delivers. And the best part? You can make it step by step even if you’ve never baked from scratch before. It’s the perfect bake for birthdays, brunches, or any day that needs a little bit of sweetness.
Table of Contents
What is Strawberry Sponge Cake?
Strawberry Sponge Cake is a classic American-style dessert that brings together a few simple elements—light sponge layers, a fruity filling, and creamy frosting—to create something elegant yet approachable. Think of it as the cousin of strawberry shortcake but a little more refined.
The sponge layers are made from just four basic ingredients: eggs, sugar, flour, and baking powder. This simplicity keeps the cake light, tender, and airy. What makes it stand out, though, is the combination of juicy strawberry filling and fluffy cream cheese frosting that ties it all together. The result is a dessert that’s sweet but not cloying, rich but not heavy, and perfect for anyone who loves the taste of fresh strawberries.
Reasons to Try Strawberry Sponge Cake
There are plenty of reasons this Strawberry Sponge Cake deserves a spot in your recipe box. First, it’s a crowd-pleaser—kids, adults, and even picky dessert eaters will love its soft texture and fruity flavor. Second, it’s refreshingly light, making it ideal for spring and summer gatherings when you want something that satisfies your sweet tooth without feeling overly rich.
Third, this cake is surprisingly easy to make step by step. You don’t need fancy tools, just a few bowls, a mixer, and some patience while the cake bakes to golden perfection. And honestly, who can resist a dessert layered with real strawberries and creamy frosting? Plus, it’s a perfect match for other berry-based desserts like this Easy Frozen Strawberry Dessert if you’re planning a summer party spread.
Ingredients Needed to Make Strawberry Sponge Cake
Strawberry Filling:
- 3 cups diced fresh strawberries
- 2 tablespoons lemon juice
- 1/2 cup light brown sugar
- 2 1/2 tablespoons cornstarch
- 1 teaspoon vanilla extract
Sponge Cake Layers:
- 6 large eggs (room temperature)
- 1 cup granulated sugar
- 1 cup all-purpose flour
- 1/2 teaspoon baking powder
Whipped Cream Cheese Frosting:
- 1 cup heavy whipping cream
- 16 oz cream cheese (softened)
- 1/2 cup unsalted butter (softened)
- 1 1/4 cups powdered sugar
- 2 teaspoons vanilla extract
- About 1 cup sliced strawberries for decoration
Instructions to Make Strawberry Sponge Cake – Step by Step
Step 1: Prepare the Strawberry Filling
Let’s start with the star of the show — that sweet-tart strawberry filling. In a heavy saucepan, combine half of your diced strawberries with the lemon juice. Cook over medium-high heat for about 5 to 6 minutes, stirring often, until the berries begin to burst and release their juices. The kitchen will start to smell incredible — like strawberry jam meets summer fairground. In a separate bowl, mix the brown sugar and cornstarch, then stir that mixture into your bubbling strawberries. Add the remaining fresh strawberries and cook for another 2 minutes, stirring constantly. You’ll notice the filling thickening into a glossy, ruby-red perfection. Once it coats the back of your spoon, remove from heat and let it cool completely. This step-by-step process is key — patience here gives you that perfect, spreadable consistency. For extra tips on thickening fruit fillings, you might love my post on Creamy Potato and Parsnip Soup where we talk about balance and texture.
Step 2: Make the Sponge Cake Batter
Now, it’s time for that fluffy foundation. Preheat your oven to 350°F and line three 9-inch round cake pans with parchment paper. Give them a quick spray of non-stick baking spray for good measure. In a small bowl, whisk together your flour and baking powder — this helps distribute the leavening evenly. In a separate large bowl, beat your six eggs on high speed for one minute until they’re foamy. Then, with the mixer running, gradually add the sugar. Keep beating for about 8 minutes until the mixture becomes thick, pale, and tripled in volume. This is where the magic happens — the eggs trap air, giving your sponge its signature lift.
Step 3: Fold and Combine
Sift one-third of your flour mixture into the egg mixture, and gently fold it in using a spatula. Repeat this process two more times, being gentle so you don’t deflate that beautiful airy batter you just worked for. The goal here is a smooth, lump-free batter that still feels light. Think of it like folding laundry — slow, deliberate, and with love. Make sure to scrape the bottom of the bowl; flour loves to hide there.
Step 4: Bake the Layers
Divide the batter equally into your prepared pans, smoothing the tops with the back of a spoon or spatula. Pop them into your preheated oven and bake for 20–25 minutes, or until the tops are golden and bounce back when lightly pressed. If your cakes dome a bit, that’s okay — you can level them once cooled. For perfectly even layers, baking strips are a secret weapon. Once baked, slide a knife around the edges to loosen, remove the cakes from the pans, and let them cool completely on a wire rack. As tempting as it is, don’t rush this step — warm cake and frosting are a recipe for disaster (or at least slippery layers).
Step 5: Make the Whipped Cream Cheese Frosting
In a cold mixing bowl, beat the heavy whipping cream on high speed until soft peaks form, then add ¼ cup of powdered sugar and continue beating until stiff peaks hold their shape. Set that aside. In another bowl, beat together the softened cream cheese, butter, and vanilla for about two minutes until creamy. Add the remaining cup of powdered sugar and mix until smooth. Now gently fold in the whipped cream. The result should be a light, luscious frosting that’s sturdy enough to hold its shape but soft enough to melt on your tongue.
Step 6: Assemble the Cake
Here’s the fun part — putting it all together, step by step. Place your first cooled cake layer on a serving dish or cake stand. Spread half of the strawberry filling over the top, staying about ½ inch from the edges so it doesn’t ooze out later. Then, spread about ½ cup of frosting over the second cake layer, invert it (frosted side down), and place it over the strawberry layer so the strawberries and cream meet in the middle — a beautiful, flavor-packed union. Repeat this with your third cake layer and remaining filling. Finally, cover the entire cake with the rest of your frosting. For a professional touch, reserve about one cup of frosting to pipe decorative swirls around the top edge. Finish with sliced strawberries for a fresh, juicy crown.
Step 7: Chill and Serve
Place your cake in the refrigerator for a few hours (or overnight if you can wait). This chilling step allows the flavors to meld and the frosting to set beautifully. When you’re ready to serve, bring it to room temperature for about 15 minutes before slicing. Each forkful should reveal layers of airy sponge, vibrant strawberry filling, and creamy frosting—a true masterpiece.
What to Serve with Strawberry Sponge Cake
This cake is a dessert that stands beautifully on its own, but it also plays well with others. Pair it with a scoop of vanilla ice cream for a classic combo, or serve with a refreshing drink like iced tea or a strawberry lemonade. For a full summertime menu, try my Garlic Butter Steak Bites for dinner, followed by this Strawberry Sponge Cake as the perfect sweet ending.
Key Tips for Making Strawberry Sponge Cake
- Room-temperature eggs are non-negotiable—they whip better and help your batter rise.
- Be gentle when folding the flour. Over-mixing will deflate your sponge.
- Chill your mixing bowl and whisk before whipping cream. It helps create perfect peaks faster.
- Use fresh strawberries whenever possible—they have a brighter flavor than frozen.
- Don’t skip the chilling step; it’s what keeps your cake sturdy and easy to slice.
Storage and Reheating Tips for Strawberry Sponge Cake
Store your Strawberry Sponge Cake in the fridge, covered, for up to four days. If you’ve got leftovers (rare, but it happens), store individual slices in airtight containers. Avoid reheating — this is a cold dessert best enjoyed straight from the fridge. For long-term storage, freeze individual slices for up to two months, wrapping them tightly in plastic wrap and foil. When ready to enjoy, thaw in the refrigerator overnight.
FAQs
Q: Can I make the cake layers ahead of time?
A: Absolutely! Bake and cool your sponge layers, then wrap them in plastic wrap and store them at room temperature for up to 24 hours, or freeze them for up to a month.
Q: Can I use frozen strawberries?
A: You can, but the filling may be slightly thinner due to extra moisture. Simmer it a bit longer to thicken it up.
Q: What if I don’t have three cake pans?
A: No worries! Bake in batches or divide the batter into two larger pans for a taller, double-layered version.
Q: Can I substitute the cream cheese frosting?
A: Sure! Try a simple whipped cream topping or even a buttercream if you prefer a richer flavor.
Final Thoughts
Making this Strawberry Sponge Cake step by step may seem like a labor of love, but the results are pure joy. It’s soft, fruity, and visually stunning—everything you could want in a dessert. It’s the kind of cake that brings people together, whether it’s a Sunday brunch or a birthday bash. So, grab your whisk, turn on your oven, and make this gorgeous Strawberry Sponge Cake. Because life’s too short not to enjoy dessert that looks like it came from a bakery but tastes like home
Visit our Pinterest for regular slow cooker recipe updates, or join our Facebook discussions where cooking fans exchange their favorite hearty meal ideas.
Print
Strawberry Sponge Cake – Light, Fluffy & Amazingly Delicious
- Total Time: 1 hour 30 minutes
- Yield: 12 servings 1x
- Diet: Vegetarian
Description
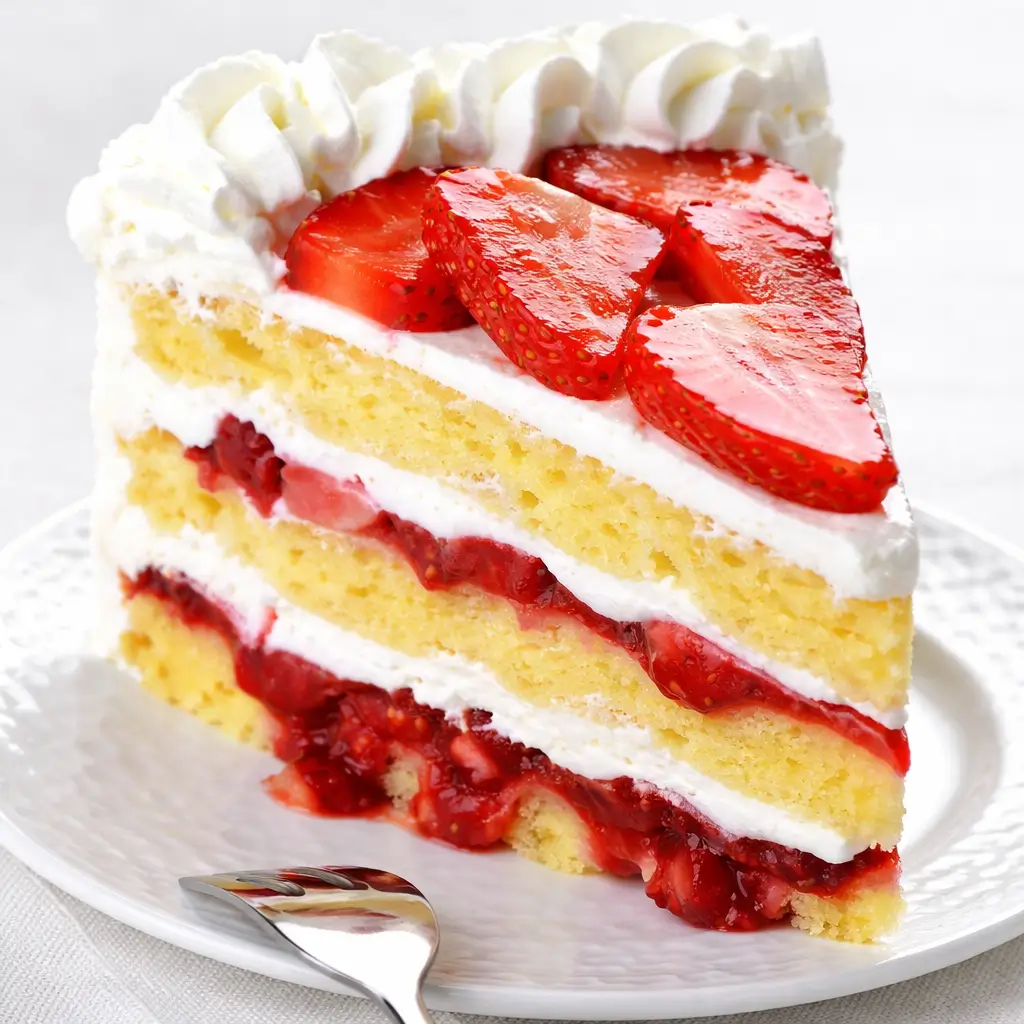
Strawberry Sponge Cake is a light and refreshing summertime dessert. Fluffy, moist sponge layers are paired with a fresh strawberry filling and whipped cream cheese frosting for the perfect blend of textures and flavors.
Ingredients
- 3 cups diced fresh strawberries
- 2 tablespoons lemon juice
- 1/2 cup light brown sugar
- 2 1/2 tablespoons cornstarch
- 1 teaspoon vanilla extract
- 6 eggs, room temperature
- 1 cup granulated sugar
- 1 cup all-purpose flour
- 1/2 teaspoon baking powder
- 1 cup heavy whipping cream
- 16 oz cream cheese, softened
- 1/2 cup unsalted butter, softened
- 1 1/4 cups powdered sugar
- 2 teaspoons vanilla extract
- About 1 cup sliced strawberries for decoration
Instructions
1. In a heavy saucepan combine half of the diced strawberries and lemon juice. Cook over medium-high heat for 5 to 6 minutes until the strawberries burst and juice is formed.
2. In a separate bowl, combine the brown sugar and cornstarch. Then stir it into the strawberry mixture. Add remaining strawberries and cook for an additional 2 minutes, stirring constantly. Once the mixture has thickened, remove from heat and set aside to cool completely.
3. Preheat oven to 350˚F and line three round 9-inch cake pans with parchment paper. Grease with baking spray and set aside.
4. In a small bowl, whisk together flour and baking powder, and set aside.
5. Beat 6 eggs for 1 minute on high speed. With the mixer on, gradually add 1 cup sugar and continue beating on high speed for 8 minutes, or until pale yellow, thick, and fluffy.
6. Sift flour in thirds into the batter, folding gently with a spatula between each addition. Scrape the bottom of the bowl to avoid flour pockets. Do not over-mix.
7. Divide batter equally between the three prepared pans. Smooth the tops and bake for 20–25 minutes, or until the tops are golden and spring back when lightly touched.
8. Slide a knife around the edges, remove cakes from pans, and cool to room temperature. Peel back parchment paper.
9. Beat cold heavy whipping cream on high speed for 1–2 minutes, add 1/4 cup powdered sugar, and mix until stiff peaks form. Set aside.
10. In another bowl, beat together cream cheese, butter, and vanilla for 1–2 minutes. Add 1 cup powdered sugar and beat until smooth and creamy. Fold in the whipped cream.
11. Place the first cake layer on a serving dish. Spread half of the strawberry filling, leaving about a 1/2-inch rim around the edges.
12. Spread about 1/2 cup frosting on the second cake layer, invert the filled side down, and place it over the first layer.
13. Spread the remaining half of the strawberry filling on top, then spread about 1/2 cup frosting on the third layer and invert it over the filling.
14. Reserve 1 cup of frosting for decoration. Spread remaining frosting over the top and sides of the cake. Chill for several hours or overnight.
15. Pipe remaining frosting around the cake and decorate with sliced strawberries on top.
16. Store leftovers in the fridge for 3–4 days.
Notes
Use baking strips on your cake pans for even, flat layers.
Do not overmix the sponge batter or it may deflate and become dense.
Let the strawberry filling cool completely before assembling the cake.
This cake is best chilled for a few hours before serving for cleaner slices and better texture.
- Prep Time: 1 hour
- Cook Time: 30 minutes
- Category: Dessert
- Method: Bake
- Cuisine: American
Nutrition
- Serving Size: 1 slice
- Calories: 410
- Sugar: 35g
- Sodium: 150mg
- Fat: 26g
- Saturated Fat: 16g
- Unsaturated Fat: 8g
- Trans Fat: 0g
- Carbohydrates: 40g
- Fiber: 1g
- Protein: 6g
- Cholesterol: 135mg


")