Strawberry Earthquake Cake is the kind of dessert that makes your oven feel like it’s giving you a hug. It’s bright, bold, and full of that unmistakable “did-someone-just-make-something-amazing?” smell that pulls everyone into the kitchen. This isn’t your ordinary strawberry cake—it’s the glorious love child of a bakery classic and a cream cheese dream, complete with chunks of white chocolate, coconut, and juicy strawberries baked right into the mix.
Think of it as the cake version of those “oops” moments in baking that actually turn out better than planned. Somewhere between messy and masterpiece, Strawberry Earthquake Cake delivers that perfect mix of gooey, creamy, and just slightly chaotic—because delicious doesn’t have to be perfect. If you’re short on time but want something that looks like you spent all afternoon making it, this cake’s your new best friend. Whether it’s a spring gathering, Sunday potluck, or random Tuesday that needed a little sparkle, this cake brings it every single time.
Table of Contents
What is Strawberry Earthquake Cake?
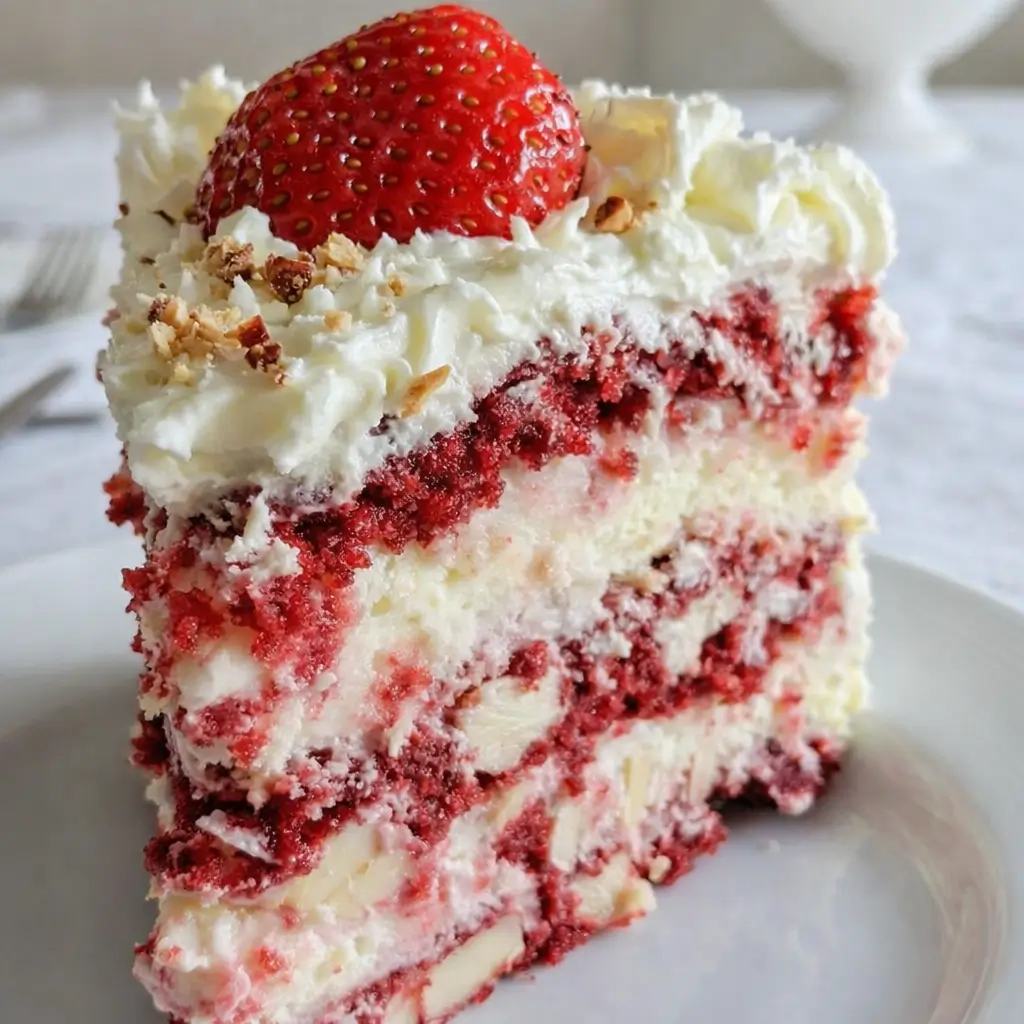
The name alone should tell you this cake isn’t playing around. Strawberry Earthquake Cake is a dessert that’s as dramatic as it sounds—in the best way possible. Imagine a strawberry cake base with little “fault lines” of creamy cheesecake running through it. The layers literally shift and swirl while baking, giving that cracked, marbled look that makes you want to dive right in. It’s got the sweetness of strawberries, the richness of white chocolate, the tropical crunch of coconut, and a buttery cream cheese swirl that melts into the batter like pure magic. It’s part cake, part cheesecake, and entirely irresistible.
This dessert is a twist on the famous “earthquake cake,” which traditionally uses German chocolate cake and cream cheese. But this strawberry version swaps cocoa for sunshine, giving you a fresh, pink, and fruity spin that feels like spring in every bite.
Reasons to Try Strawberry Earthquake Cake
There are a dozen good reasons to fall for this cake, but let’s hit the big ones.
First, it’s ridiculously easy. You start with a boxed strawberry cake mix, which means no need to haul out a bunch of ingredients or spend your morning measuring flour. Just a few tweaks—like adding chopped strawberries, coconut, and white chocolate—turn that humble mix into something spectacular.
Second, it’s visually stunning. Those marbled cream cheese swirls look like you spent hours mastering your baking technique when, in reality, you just dragged a knife through the batter. Third, it’s a crowd-pleaser. Even people who claim they’re “not dessert people” tend to come back for seconds. And last but not least, it’s customizable. Swap strawberries for raspberries, toss in dark chocolate instead of white, or go wild and try it with toasted almonds instead of pecans.
If you love recipes that walk the line between easy and extraordinary, you’ll also adore Strawberry Cheesecake Cookies or our Strawberry Shortcake Cupcakes—they’ve got that same “pretty enough for company, easy enough for weeknights” vibe.
Ingredients Needed to Make Strawberry Earthquake Cake
For the Cake Base:
- 1 box strawberry cake mix (plus ingredients listed on the box—eggs, oil, and water)
- 1½ cups fresh or frozen strawberries, chopped
- 1 cup white chocolate chips or chunks
- 1 cup sweetened shredded coconut
- ½ cup chopped pecans or walnuts (optional)
For the Cream Cheese Swirl:
- 8 oz cream cheese, softened
- ½ cup unsalted butter, softened
- 2½ cups powdered sugar
- 1 teaspoon vanilla extract
Instructions to Make Strawberry Earthquake Cake – Step by Step
Step 1: Preheat and Prepare
Let’s start this Strawberry Earthquake Cake step by step journey the right way—by setting up for success. Preheat your oven to 350°F (175°C). Grease a 9×13-inch baking pan with butter or nonstick spray, making sure to coat every corner (trust me, this cake loves to cling). If you’ve got parchment paper, line the pan for extra insurance—because who wants to wrestle with sticky cake edges later?
Step 2: Mix the Cake Base
Prepare your strawberry cake mix according to the package directions. It’s your shortcut to fluffy perfection, and that’s nothing to be ashamed of. Once your batter is smooth and pink like bubblegum, gently fold in your chopped strawberries, white chocolate chips, coconut, and nuts (if you’re feeling fancy). This is where the “earthquake” starts—each bite gets a surprise mix of textures and flavors. Stir just until everything’s evenly distributed.
Step 3: Make the Cream Cheese Swirl
Now for the creamy heart of this dessert. In a medium bowl, beat together your softened cream cheese and butter until smooth and fluffy. No lumps, no cold chunks. (Pro tip: if your cream cheese or butter is still chilly, microwave them for 10 seconds to soften slightly.) Next, add powdered sugar gradually—no one wants a sugar snowstorm in the kitchen—and pour in the vanilla. Mix until it’s silky and spreadable.
Step 4: Layer and Swirl
Pour half of your strawberry batter into the prepared pan. Then, drop spoonfuls of your cream cheese mixture across the surface like little clouds of joy. Don’t worry about precision—the beauty of this cake is in its mess. Spoon the rest of the batter on top, then grab a butter knife and gently swirl it through the layers. The goal is to create those creamy ribbons without completely blending the two batters. Think marble, not smoothie.
Step 5: Bake the Magic
Slide the pan into the oven and bake for 40–45 minutes, or until the center is set and a toothpick inserted near the middle comes out mostly clean (a few moist crumbs are perfect). The top should look golden and slightly cracked—that’s your “earthquake” effect in action. Your kitchen will smell like strawberry shortcake and summer fair memories, so try not to hover too close to the oven door.
Step 6: Cool, Slice, and Serve
Once baked, let the cake cool completely in the pan before slicing. This part takes patience—but if you cut too soon, the cream cheese layer will still be molten and messy (unless that’s the look you’re going for). Once cooled, slice into squares and admire the swirls. You can dust the top with powdered sugar or serve with whipped cream for a little extra flair.
Step 7: Bonus Step – Add Your Personal Touch
This Strawberry Earthquake Cake step by step guide is the foundation, but you can make it your own. Try a drizzle of melted white chocolate over the top once cooled, or sprinkle freeze-dried strawberries for crunch. Want to go bold? Top with a scoop of vanilla ice cream and a handful of fresh berries—it’s downright indulgent.
For even more strawberry dessert ideas, check out Strawberry Crunch Cake or our nostalgic Strawberry Pretzel Pie. They all carry that same cheerful, creamy vibe.
What to Serve with Strawberry Earthquake Cake
Pair this cake with a chilled glass of milk for the kids or a hot cup of coffee for yourself (you’ve earned it). It also plays beautifully with light spring salads or barbecue dinners—it’s sweet enough to feel celebratory but not so heavy that it overpowers the meal. For a full spread, try serving it alongside our Strawberry Shortcake Fluff Salad or the refreshingly tangy Strawberry Pretzel Jello Salad. It’s a match made in fruity heaven.
Key Tips for Making Strawberry Earthquake Cake
- Room temperature is your friend. Make sure your cream cheese and butter are soft before mixing—it makes for a smoother, creamier swirl.
- Don’t over-swirling. You want visible layers, not pink mush. Two or three figure-eights through the batter will do the trick.
- Use real strawberries. Fresh berries give this cake that extra pop of flavor and moisture, though thawed and drained frozen berries work great too.
- Upgrade your mix-ins. Swap coconut for white chocolate chips, or toss in crushed freeze-dried strawberries for extra punch.
- Let it cool. The flavors actually deepen as the cake rests. It’s even better the next day.
Storage and Reheating Tips for Strawberry Earthquake Cake
Store leftover Strawberry Earthquake Cake covered in the refrigerator for up to 5 days. Because of the cream cheese swirl, it’s best kept chilled. When you’re ready to enjoy another slice, let it sit at room temperature for about 20 minutes or warm it gently in the microwave for 10–15 seconds. The texture turns soft and gooey again, like it just came out of the oven. You can also freeze individual squares (wrap them tightly in plastic wrap, then foil) for up to 2 months. Thaw overnight in the fridge before serving.
FAQs
Can I use another cake mix flavor?
Absolutely. Vanilla, lemon, or even funfetti cake mix all make great bases for your own “earthquake” twist.
Do I have to use nuts?
Not at all! They’re optional. If allergies are a concern, skip them completely or try sunflower seeds for crunch.
Why is it called an “Earthquake Cake”?
Because the layers shift and crack as it bakes—like a sweet, dessert-sized fault line. Don’t worry, it’s the only earthquake you’ll be happy about.
Can I make this ahead of time?
Yes! It actually tastes better the next day after chilling overnight. Just store it covered in the fridge.
What can I serve it with?
A dollop of whipped cream, a scoop of ice cream, or just a fork and a quiet moment.
Final Thoughts
There’s something beautifully imperfect about Strawberry Earthquake Cake. It’s proof that the best desserts don’t have to be flawless—they just have to taste amazing. Between the fluffy cake, gooey cream cheese swirls, and bursts of real strawberry flavor, this is one of those recipes you’ll find yourself making “just because.” Whether you’re celebrating something or simply need a pick-me-up, this cake delivers comfort and sweetness in every bite. And once you see those cracks and swirls appear in the oven, you’ll know: this is one dessert that really shakes things up.
Visit our Pinterest for regular slow cooker recipe updates, or join our Facebook discussions where cooking fans exchange their favorite hearty meal ideas.
Print
Strawberry Earthquake Cake – Easy, Delicious, and Full of Flavor
- Total Time: 1 hour
- Yield: 12 servings 1x
Description
This Strawberry Earthquake Cake is a moist, bakery-style dessert made with strawberry cake mix, fresh strawberries, white chocolate, coconut, and a rich cream cheese swirl baked right in.
Ingredients
Cake Base:
- 1 box strawberry cake mix
- Ingredients listed on the box (eggs, oil, water)
- 1½ cups fresh or frozen strawberries, chopped
- 1 cup white chocolate chips or chunks
- 1 cup sweetened shredded coconut
- ½ cup chopped pecans or walnuts (optional)
Cream Cheese Swirl:
- 8 oz cream cheese, softened
- ½ cup unsalted butter, softened
- 2½ cups powdered sugar
- 1 teaspoon vanilla extract
Instructions
1. Preheat oven to 350°F (175°C). Grease a 9×13-inch baking pan.
2. Prepare strawberry cake mix according to package directions.
3. Gently fold in chopped strawberries, white chocolate chips, coconut, and nuts if using.
4. Pour half of the batter into the prepared pan.
5. In a bowl, beat cream cheese and butter until smooth. Add powdered sugar and vanilla; mix until creamy.
6. Drop spoonfuls of cream cheese mixture over the batter.
7. Pour remaining batter on top and gently swirl with a knife.
8. Bake for 40–45 minutes or until the center is set.
9. Cool completely before slicing and serving.
Notes
Use room-temperature cream cheese and butter for a smooth swirl.
Thaw and drain frozen strawberries well before using.
Avoid over-swirling to keep distinct cream cheese pockets.
Store leftovers covered in the refrigerator for up to 5 days.
- Prep Time: 15 minutes
- Cook Time: 45 minutes
- Category: Dessert
- Method: Baking
- Cuisine: American
Nutrition
- Serving Size: 1 slice
- Calories: 420


")