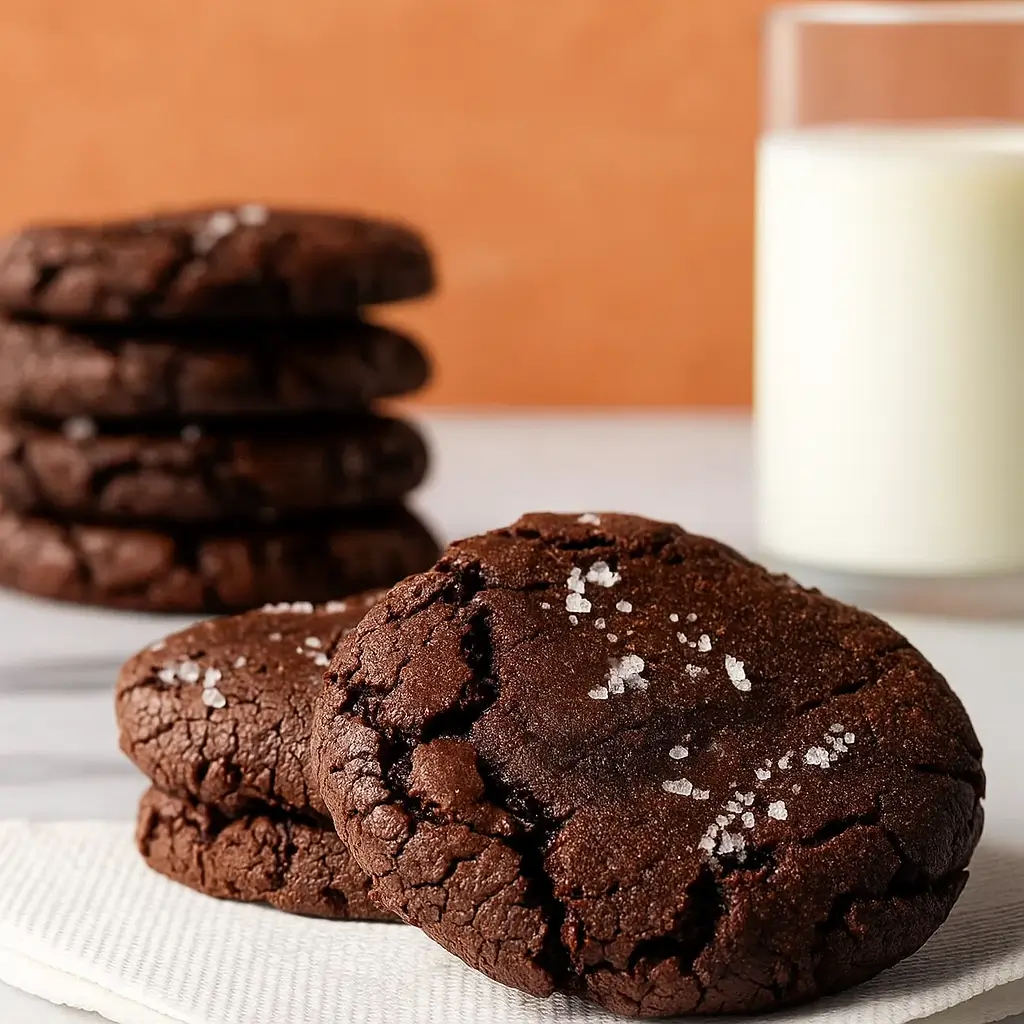
Let’s talk about Fudgy Chocolate Protein Cookies—because yes, you can have your cookie and hit your protein goals, too. These rich, chocolatey little indulgences are like a post-gym high-five and a brownie had a delicious baby. Whether you’re dealing with a mid-afternoon sweet tooth or need a guilt-free snack after chasing toddlers or spreadsheets, this recipe is your new go-to.
With a fudgy bite, low sugar, and a whopping 10g of protein per cookie, they’re secretly healthy but taste like dessert-drawer-worthy treats. Oh, and the best part? They’re simple, fast, and picky-eater approved (yes, even your spouse who “doesn’t do healthy cookies”). Keep reading, because we’re about to change your cookie game for good—with Fudgy Chocolate Protein Cookies as your new sweet staple.
Table of Contents
What are Fudgy Chocolate Protein Cookies?
Fudgy Chocolate Protein Cookies are the kind of dessert that sneak into your life and suddenly become a weekly tradition. They’re dense and chewy, bursting with chocolate flavor, but with a secret: they pack a solid protein punch. Think classic fudge brownie meets your favorite protein bar, only way less chalky and way more craveable.
These cookies are made with a blend of whey/casein protein powder, cocoa powder, and oat flour, keeping them gluten-light and protein-rich. And rather than being overloaded with sugar, they use a brown sugar substitute and unsweetened applesauce for sweetness and moisture. Ideal for anyone looking to satisfy that sweet craving while still feeling like they made a smart choice. They’re especially perfect if you’re trying to balance fitness goals with your love for chocolate (been there).
Reasons to Try Fudgy Chocolate Protein Cookies
Let’s be real: finding a dessert that doesn’t leave you with sugar guilt and a crash two hours later is like finding jeans that fit just right. That’s why Fudgy Chocolate Protein Cookies are a total game-changer. First off, they taste like a brownie married a soft cookie—rich, chocolatey, and satisfyingly chewy.
But they’re also loaded with protein, making them a smart pick post-workout or as a mid-morning snack that won’t have you rummaging through the pantry an hour later. They’re easy to make (just one bowl!), don’t require fancy ingredients, and even freeze like a dream. Plus, if you’re baking for kids, partners, or coworkers, they’ll never guess these are secretly nutritious. It’s a cookie that works as hard as you do—and still feels like a treat. Win-win.
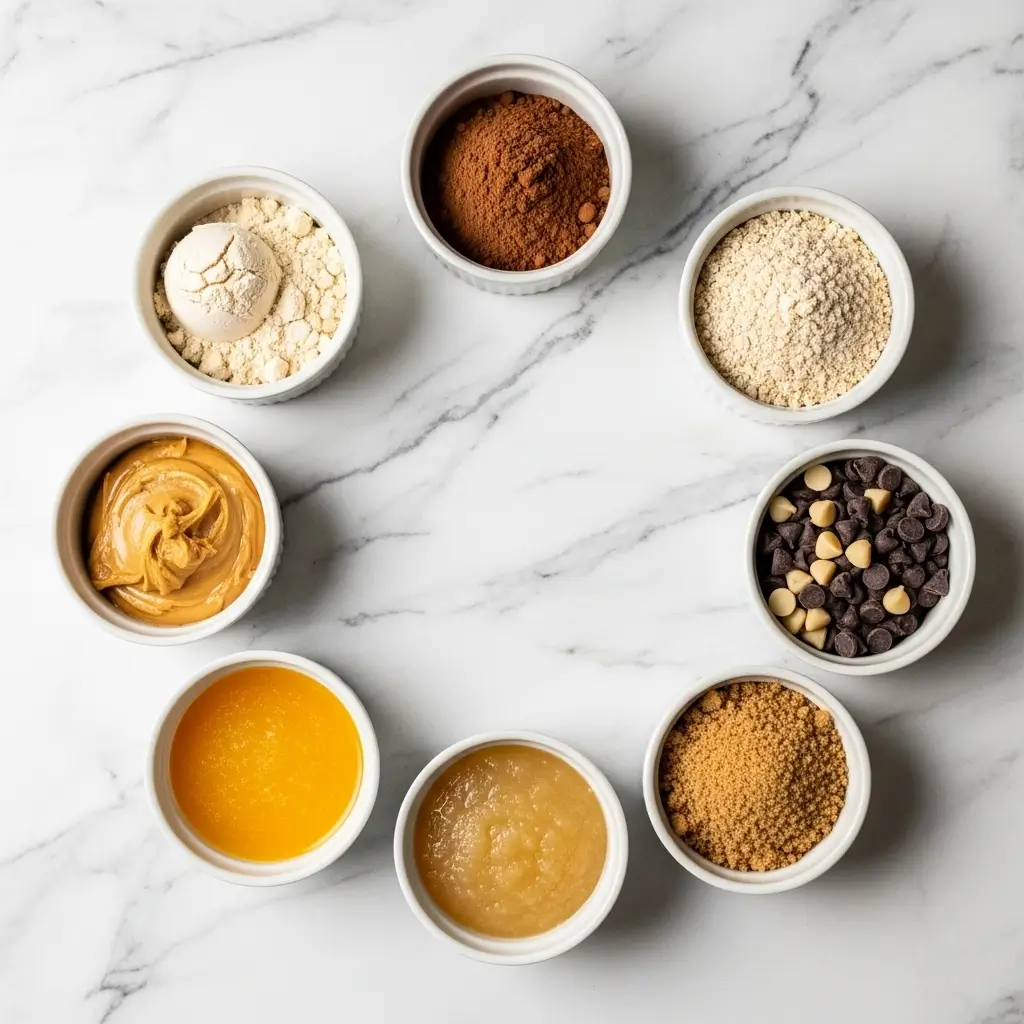
Ingredients Needed to Make Fudgy Chocolate Protein Cookies
Dry Ingredients:
- 46g (1.5 scoops) Chocolate Whey/Casein Blend Protein Powder
- 28g Oat Flour
- 10g Cocoa Powder
- 30g Brown Sugar Substitute
- 1/2 tsp Baking Soda
- Dash of Salt
Wet Ingredients:
- 32g (2 Tbsp) Peanut Butter
- 28g Full-Fat Butter (recommended for best texture)
- 15g Chocolate Chips
- 50g Unsweetened Applesauce
Instructions to Make Fudgy Chocolate Protein Cookies
Ready to make some seriously delicious cookies that double as a protein boost? This step by step guide breaks everything down so even if you’re new to baking or short on time, you’ll feel confident and maybe even a little excited to whip up a batch. Let’s get into it!
Step 1: Gather and Measure All Ingredients
Before you touch a mixing bowl, do a quick check that you’ve got everything on the ingredient list ready and measured. It sounds simple, but this step by step prep makes the process smoother, faster, and way less stressful (because no one wants to realize halfway through that they’re out of cocoa powder). Need help with substitutions? We’ve got a full guide on easy baking ingredient swaps to help you adjust for what’s in your pantry.
Step 2: Mix the Dry Ingredients
In a large mixing bowl, combine your chocolate whey/casein protein powder, oat flour, cocoa powder, brown sugar substitute, baking soda, and a dash of salt. Use a whisk or fork to break up any lumps and evenly blend everything. This step by step mixing ensures that each cookie has consistent flavor and texture. Tip: Using a fine mesh sifter can help avoid clumps if your cocoa powder tends to cake up.
Step 3: Melt the Wet Ingredients Together
In a small, microwave-safe bowl, add the butter, peanut butter, and chocolate chips. Microwave for 30 seconds, then stir. If it’s not completely smooth yet, microwave for another 10–15 seconds. Stir until you’ve got a creamy, glossy mixture that smells heavenly. This step by step melting process helps combine fats and sugars evenly, giving your cookies that fudgy, chewy finish.
Step 4: Combine Wet and Dry Mixtures
Pour the warm butter-peanut butter-chocolate blend into your dry ingredients. Add the unsweetened applesauce right after—it helps bind everything and keeps your cookies soft without eggs. Stir with a silicone spatula or wooden spoon until a thick, sticky cookie dough forms. This step by step dough formation might take a minute, but once it all comes together, you’ll know you’ve hit the sweet spot. (If your dough feels too sticky, chill it a few minutes before the next step.)
Step 5: Chill the Dough
Cover the bowl and pop the dough into the fridge for at least 1 hour. This chill time is essential for helping the dough firm up, making it easier to shape and preventing cookies from spreading too much while baking. Want to learn more about how chilling improves texture? Check out our Healthy Greek Yogurt Banana Muffins where we use a similar trick for soft, bakery-style results.
Step 6: Preheat Your Oven and Prep Your Baking Sheet
After the dough has chilled, preheat your oven to 350°F (175°C). Line a baking sheet with parchment paper or a silicone baking mat to prevent sticking and make cleanup a breeze. This step by step baking prep also helps the cookies bake evenly, especially if your oven runs a little hot or cold.
Step 7: Shape the Cookies
Divide your dough into 6 equal parts. Roll each piece into a ball with your hands, then place them on the prepared baking sheet. Gently press each down to form thick, puck-shaped cookies. This step by step shaping ensures each cookie bakes to the perfect size and thickness. Want them to look extra polished? Try the popular “cookie swirl” trick: after baking, place a cup upside down over each warm cookie and gently swirl it in a circular motion to smooth the edges.
Step 8: Bake
Place the cookies in the oven and bake for exactly 8 minutes. Don’t be tempted to bake longer! These cookies will still feel soft when you take them out, but they firm up as they cool—thanks to that step by step chill time earlier. Trust the process.
Step 9: Cool Completely
Let the cookies cool on the tray for 5 minutes before transferring them to a wire rack. Let them rest for at least 1 hour. This final step by step cooling phase is what transforms your cookies from warm dough blobs to perfectly fudgy, protein-packed bites. If you skip this part, they may fall apart (and no one wants a cookie casualty).
Step 10: Store and Enjoy
Once cooled, store your Fudgy Chocolate Protein Cookies in an airtight container. They’ll stay fresh at room temperature for 3–4 days, or you can refrigerate them for up to a week. Want to make extras? These cookies freeze well too—just wrap them individually for easy grab-and-go snacks.
Craving more high-protein, easy-to-make treats? Check out our Homemade Protein Snickers Bars for another indulgent-yet-healthy option.
By following this step by step guide, you’ll end up with a batch of cookies that are fudgy, satisfying, and loaded with enough protein to make you feel like a kitchen rockstar. Whether it’s your first time baking or your fiftieth, this foolproof process has your back.
What to Serve with Fudgy Chocolate Protein Cookies
These cookies are flexible like your favorite pair of yoga pants. Craving something cozy? Pair with a warm mug of coffee or a glass of almond milk. Want to go full post-gym reward mode? Grab a cookie with a side of vanilla Greek yogurt or your favorite protein shake. They also play nicely with a scoop of low-calorie ice cream for a late-night dessert fix. And if you’re really feeling extra, warm one up and crumble it over your morning oatmeal—seriously. However you enjoy them, Fudgy Chocolate Protein Cookies fit right in, whether it’s snack o’clock or dessert time.
Key Tips for Making Fudgy Chocolate Protein Cookies
Want them fudgy, not dry? The chill time is non-negotiable—don’t skip it! That hour in the fridge makes the dough easier to work with and keeps the texture chewy and dense. Use a whey/casein blend if you can—straight whey might leave your cookies dry or crumbly. Butter really does matter here—low-fat spreads can work, but they’ll alter the final texture. Don’t be afraid to underbake! These cookies continue to firm up as they cool, and slightly underdone centers are where the magic happens. Finally, go easy on substitutions the first time around so you can get a feel for the original texture and flavor.
Storage and Reheating Tips Fudgy Chocolate Protein Cookies
Once cooled, keep your Fudgy Chocolate Protein Cookies in an airtight container at room temperature for up to 4 days (though they rarely last that long). Want to stretch them longer? Pop them in the fridge for up to a week, or freeze for up to 3 months. Just defrost overnight or warm them up for 10–15 seconds in the microwave for that fresh-out-of-the-oven softness. If you like them extra gooey, zap for a few extra seconds and enjoy that melted chocolate chip moment—pure bliss.
FAQs
Can I use vanilla protein powder instead of chocolate?
Totally! Just add extra cocoa powder to keep the chocolate vibe strong.
Are these cookies safe to eat raw?
Yep! Since there are no eggs and the protein powder is safe, underbaking is totally fair game here.
Can I double the recipe?
Absolutely. Just make sure to chill the dough before baking and maybe use two pans or bake in batches.
What if I don’t have oat flour?
You can blend rolled oats into a flour-like texture or sub in almond flour (though it may change texture slightly).
Final Thoughts
There you have it—Fudgy Chocolate Protein Cookies that hit the sweet spot between indulgent and practical. Whether you’re a gym rat, a busy mom, or someone just looking to curb cravings without crushing your goals, this recipe is your new pantry MVP. Rich, chewy, and packed with just the right amount of goodness, these cookies are about to become your not-so-guilty pleasure. For more healthy baking inspo, don’t miss our Healthy Greek Yogurt Banana Muffins or this reader-favorite Protein Banana Bread. Keep baking, keep snacking smart, and don’t forget: life’s too short for boring protein.
Visit our Pinterest for regular slow cooker recipe updates, or join our Facebook discussions where cooking fans exchange their favorite hearty meal ideas.
Print
Fudgy Chocolate Protein Cookies – Guilt-Free Chocolate Fix
- Total Time: 2 hours 18 minutes
- Yield: 6 cookies 1x
- Diet: Low Fat
Description
These Fudgy Chocolate Protein Cookies combine rich chocolate flavor with high-quality protein, making them a perfect treat for those seeking a healthier, protein-packed dessert. The cookies have a soft, fudgy texture and are sweetened with a sugar substitute and unsweetened applesauce, making them lower in sugar but still indulgent. Ideal for a post-workout snack or anytime you crave a chocolatey delight without the guilt.
Ingredients
- 46g (1.5 scoops) chocolate whey/casein blend protein powder
- 28g oat flour
- 10g cocoa powder
- 30g brown sugar substitute
- 1/2 tsp baking soda
- Dash of salt
- 32g (2 Tbsp) peanut butter
- 28g butter (regular full-fat butter recommended)
- 15g chocolate chips
- 50g unsweetened applesauce
Instructions
1. In a large bowl, combine the protein powder, cocoa powder, oat flour, brown sugar substitute, baking soda, and a dash of salt. Stir well to evenly distribute all dry components.
2. Place the butter, peanut butter, and chocolate chips in a small microwave-safe bowl. Microwave for 30 seconds, then stir thoroughly to melt and combine into a smooth mixture.
3. Pour the melted butter mixture into the bowl with dry ingredients. Add the unsweetened applesauce and mix with a silicone spatula until a cohesive cookie dough forms.
4. Refrigerate the dough for one hour to allow it to firm up, which helps in shaping and baking.
5. After chilling, preheat your oven to 350°F (175°C).
6. Divide the dough into 6 equal portions. Roll each portion into a ball and place on a parchment-lined baking sheet. Gently press down on the tops of the balls to form thick, puck-shaped cookies.
7. Bake in the preheated oven for 8 minutes until the cookies are set but still soft.
8. While cookies are warm, you can place an upside-down cup over each and gently move in a circular motion to create perfectly round cookies.
9. Allow the cookies to cool for at least one hour. They will firm up as they cool, reaching the ideal fudgy texture.
10. Store any leftover cookies in an airtight container and enjoy throughout the week.
Notes
Use a whey and casein protein powder blend for best texture and taste; other protein powders might alter results.
To reduce calories, substitute butter with a light butter alternative, though texture may be slightly compromised.
Vanilla protein powder can also be used if you add cocoa powder, preserving the chocolate flavor.
This recipe yields cookies safe to eat raw; underbaking is an option if you prefer a softer texture.
- Prep Time: 10 minutes
- Cook Time: 8 minutes
- Category: Dessert
- Method: Baking
- Cuisine: American
Nutrition
- Serving Size: 1 cookie
- Calories: 150
- Sugar: 1g
- Sodium: 120mg
- Fat: 7g
- Saturated Fat: 3g
- Unsaturated Fat: 3g
- Trans Fat: 0g
- Carbohydrates: 12g
- Fiber: 3g
- Protein: 10g
- Cholesterol: 20mg

")