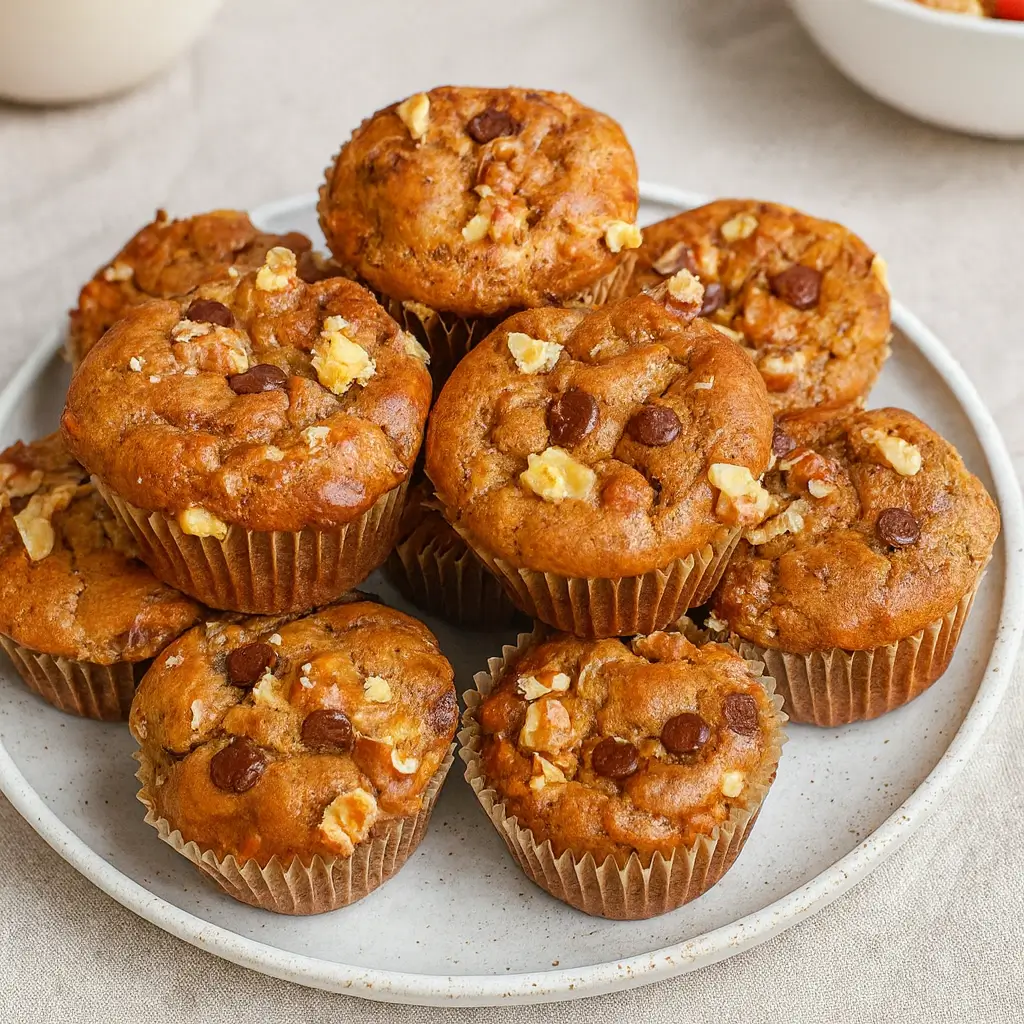
Flourless Banana Muffins are the kind of snack that makes you feel like you’re winning at life. Moist, naturally sweetened, packed with peanut butter and melty chocolate chips—they’re basically little bites of joy. Whether you’re juggling work meetings, school lunches, or just trying to make it through the day without raiding the candy drawer, these muffins get you.
Oh, and let’s not forget the best part: they’re completely flourless, which means no gluten, no fuss. Toss everything into a bowl, bake, and boom—your kitchen smells like heaven in under 30 minutes. With just a handful of pantry staples, you’ll have a snack that’s satisfying, protein-rich, and totally mom-approved. Flourless banana muffins are here to make your snack game stronger, your mornings smoother, and your chocolate cravings happily fulfilled.
Table of Contents
What is Flourless Banana Muffins?
Flourless Banana Muffins are delicious little wonders made without any flour (yep, not even almond or oat flour!). Instead, they rely on ripe bananas, creamy peanut butter, and eggs to give them structure. The result? Muffins that are soft, slightly chewy, and naturally sweet without needing refined sugar or gluten. Think of them as banana bread’s cooler, protein-packed cousin—dressed up with dark chocolate chips and a few chopped walnuts for crunch.
Perfectly portioned for grab-and-go mornings or after-school snacking, these muffins skip the complicated ingredients and still taste like a treat. And bonus? They’re super adaptable. You can skip the chocolate (but why would you?) or swap in almond butter if that’s more your jam. Either way, flourless banana muffins are a game changer when you’re trying to keep it wholesome without sacrificing flavor.
Reasons to Try Flourless Banana Muffins
Let’s be honest—some days, we just need something quick, tasty, and not loaded with junk. That’s where flourless banana muffins shine. First off, they’re crazy easy. Like, mix-it-in-one-bowl easy. No stand mixer, no flour mess, no stress. Second, they’re naturally gluten-free and grain-free, which is perfect if you’re cutting back or cooking for someone with dietary restrictions. Plus, the bananas and maple syrup give just the right amount of sweetness—no refined sugar crash later.
And let’s talk about the texture: moist, melt-in-your-mouth, and dotted with gooey chocolate chips. You’ll actually look forward to breakfast. These muffins also make excellent lunchbox additions, pre-workout fuel, or “I just need a minute” snacks. And if you’re trying to sneak something nutritious into your kids’ diet without them noticing—this is your golden ticket. Trust me, everyone wins with these.
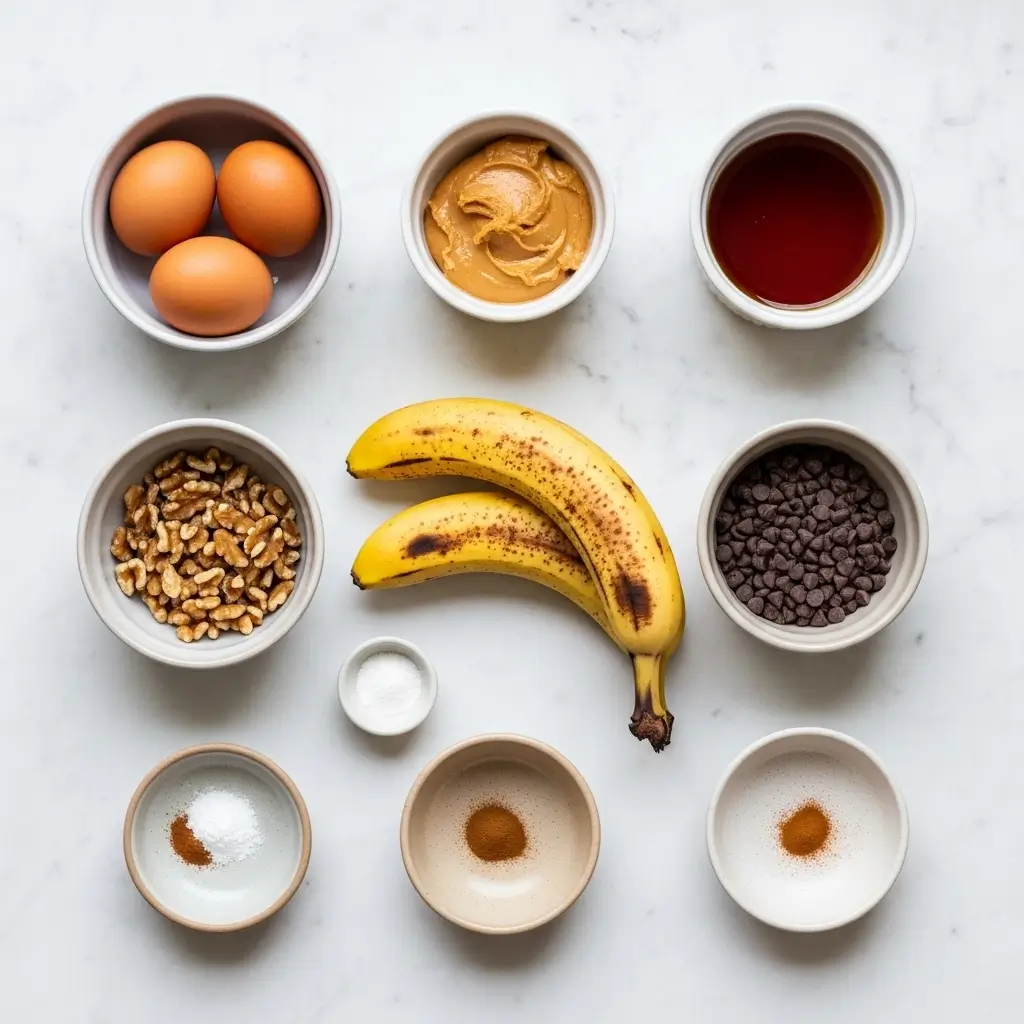
Ingredients Needed to Make Flourless Banana Muffins
- 2 ripe bananas, mashed
- 1 cup peanut butter (smooth, natural, and drippy is best)
- 2 eggs
- ¼ cup maple syrup
- 1 tsp baking soda
- Dash of cinnamon
- ½ cup dark chocolate chips
- ¼ cup walnuts, chopped (optional but delightful)
Instructions to Make Flourless Banana Muffins
If you’re new to baking or just want a foolproof method, this step by step guide to making flourless banana muffins has your back. From prepping your oven to pulling out perfectly golden, chocolate-dotted muffins, we’ll walk through every part of the process in detail—so even if you’ve never baked a thing in your life, you’ll be totally set. And if you’re already a muffin pro? You might just pick up a few new tricks along the way. Let’s dive in.
Step 1: Preheat Your Oven and Prepare the Muffin Tin
Before you start mixing ingredients, go ahead and preheat your oven to 350°F (175°C). This ensures your muffins bake evenly and rise beautifully. While the oven heats up, grab a standard 12-cup muffin tin and line it with cupcake liners. If you’re out of liners (hey, it happens), just lightly grease the cups with non-stick spray or a dab of coconut oil. This step might seem basic, but prepping your bakeware properly means no sticking, no mess—and a smoother cleanup later.
Looking for more tips on prep like this? Check out our guide on smart baking hacks for beginners that can make a big difference in your final results.
Step 2: Mash the Bananas Like a Pro
Grab two ripe bananas—like, super ripe. The spottier the peel, the sweeter your muffins will be. Peel and place them in a large mixing bowl, then mash with a fork or potato masher until mostly smooth with just a few small lumps. If you’re using frozen bananas, be sure they’re fully thawed and drained of excess moisture. Mashing thoroughly is key here—it helps distribute the banana flavor evenly while giving the batter a nice, smooth texture.
If you’re short on bananas or need to make a swap, check out our fruit substitution guide to learn how applesauce or pumpkin purée can step in.
Step 3: Add Wet Ingredients and Whisk It All Together
To your mashed bananas, add 1 cup of smooth, natural peanut butter, 2 eggs, and ¼ cup of maple syrup. Stir everything together until well combined. The batter should be thick but smooth and pourable.
Make sure you’re using a drippy, natural peanut butter—the kind that only has peanuts and salt listed as ingredients. Skip the stiff, sugary stuff from the back of the pantry. A smooth blend helps everything mix evenly and keeps the muffins ultra-moist.
Want more ideas for healthy nut butters? Take a peek at our almond butter recipe alternatives that work in similar bakes.
Step 4: Add the Flavor Boosters
Time to level up the flavor. Sprinkle in 1 teaspoon of baking soda and a dash of cinnamon (or a generous pinch if you’re feeling cozy). Mix gently to combine. These ingredients may be small, but they pack a punch—baking soda gives your muffins a light lift, and cinnamon adds that warm, comforting aroma we all love. You could even toss in a pinch of nutmeg or vanilla extract for extra depth.
Step 5: Fold in the Fun (a.k.a. Chocolate Chips and Walnuts)
Here comes the best part: the mix-ins. Add ½ cup of dark chocolate chips and ¼ cup of chopped walnuts (totally optional, but highly recommended). Use a rubber spatula or spoon to fold them into the batter gently. Don’t overmix—just a few folds will do the trick.
Love your muffins loaded? Feel free to stir in more goodies like dried cranberries, chopped pecans, or shredded coconut. Or, for a nut-free version, swap the walnuts with sunflower seeds or skip them altogether. We’ve got a whole lineup of nut-free snack recipes if you’re cooking for allergy-sensitive folks.
Step 6: Fill the Muffin Cups
Scoop the batter into your prepared muffin tin, filling each liner about ¾ of the way full. This gives your muffins room to rise while still giving you that picture-perfect muffin top. If you’ve got extra batter, don’t be shy—make a few mini muffins or bake the overflow in a small ramekin for a snack-sized treat.
Optional but encouraged: press a few extra chocolate chips or chopped nuts on top for an Insta-worthy finish (and some bonus texture).
Step 7: Bake Until Golden and Glorious
Slide the muffin tin into your preheated oven and bake for 20–25 minutes. Start checking around the 20-minute mark by inserting a toothpick in the center of one muffin—it should come out clean or with just a few moist crumbs. If there’s gooey batter on the stick, let them bake a few minutes longer. Every oven runs a little differently, so trust your eyes and nose too.
Your kitchen will start to smell amazing—like banana bread, peanut butter cookies, and chocolate brownies had a love child.
Step 8: Cool and Enjoy (or Try Not to Eat Them All at Once)
Once the muffins are done baking, remove the pan from the oven and let them cool for about 5 minutes in the tin. Then transfer each muffin to a wire rack to cool completely. This helps them set up and prevents soggy bottoms.
But hey, no judgment if you break into one while it’s still warm. The chocolate will be all melty, and the texture is just dreamy.
Want to level up your muffin game? Pair these with one of our favorite high-protein breakfast ideas to start your day feeling full and fueled.
What to Serve with Flourless Banana Muffins
These muffins are super versatile and play well with others. Pair them with a creamy latte for a cozy breakfast, or enjoy them alongside a green smoothie if you’re channeling your inner wellness goddess. They’re also perfect with a dollop of Greek yogurt and a drizzle of honey for a more filling snack. Hosting brunch? These are a dreamy addition to a spread of eggs, fruit salad, and maybe even these Greek turkey meatballs for something savory on the side. Kids love them with a glass of milk, and moms love them with 5 minutes of silence. However you serve them, you’re going to want seconds.
Key Tips for Making Flourless Banana Muffins
- Use super ripe bananas—we’re talking brown spots all over. They’re sweeter and give you the best flavor and texture.
- Go for drippy peanut butter. Avoid the thick, dry kind. You want smooth, two-ingredient peanut butter (just peanuts + salt) so the muffins turn out soft and creamy.
- Don’t overmix once you add the chocolate chips—gentle folds keep the batter fluffy.
- Check early. Every oven is different, so start checking around 20 minutes.
- Let them cool completely before storing. Otherwise, you might end up with soggy bottoms (and no one likes that).
Storage and Reheating Tips for Flourless Banana Muffins
Once your muffins are cool, pop them into an airtight container. They’ll stay fresh on the counter for 3-4 days. Want them to last longer? Stick them in the fridge for up to a week. These also freeze like a dream—wrap them individually and toss into a freezer-safe bag. To reheat, microwave for 15-20 seconds (add a sprinkle of extra chocolate chips if you’re living your best life). Perfectly warm, soft, and ready to brighten your day. They’re also amazing cold straight from the fridge—like a mini banana bread brownie.
FAQs
Can I skip the chocolate chips?
Totally. They’re optional—but let’s be honest, why would you?
What can I use instead of peanut butter?
Try almond butter or cashew butter, but make sure it’s the natural, runny kind. Sunflower seed butter works too for a nut-free option.
Are these muffins kid-friendly?
Yes! They’re soft, sweet, and full of good stuff. Just skip the nuts if there’s an allergy concern.
Can I make these vegan?
You can experiment with flax eggs, but the texture might change slightly. Let us know if you try it!
Final Thoughts
Flourless Banana Muffins are more than just a recipe—they’re a little slice of snack-time joy that fits into real life. Whether you’re meal prepping for the week, wrangling toddlers, or simply craving something sweet that won’t leave you in a sugar crash coma, this one’s a keeper. No flour, no fuss, just good-for-you ingredients that taste like a treat. If you’re looking to add more high-protein snacks to your lineup, head over to our protein muffin collection—you’ll find plenty more delicious, no-nonsense options to love.
Visit our Pinterest for regular slow cooker recipe updates, or join our Facebook discussions where cooking fans exchange their favorite hearty meal ideas.
Print
Flourless Banana Muffins: Easy, Moist & Gluten-Free Bliss
- Total Time: 25 minutes
- Yield: 12 muffins 1x
Description
These flourless peanut butter banana muffins are my new favorite dessert! Moist banana muffins with pockets of warm melty chocolate and a subtle hint of peanut butter. Plus they are gluten and grain free!
Ingredients
- 2 ripe bananas, mashed
- 1 cup peanut butter
- 2 eggs
- ¼ cup maple syrup
- 1 tsp baking soda
- dash cinnamon
- ½ cup dark chocolate chips
- ¼ cup walnuts, chopped
Instructions
1. Preheat oven to 350°F. Place cupcake liners in a muffin tin.
2. Mix together all ingredients for the batter until well combined. Fold in chocolate chips.
3. Pour batter into cupcake liners, filling each cup about 3/4 of the way full. Add in more chocolate chips on top.
4. Bake for about 20-25 minutes or until a toothpick comes out clean.
5. Remove muffins from oven and place on a cooling rack until cool. Enjoy!
Notes
Make sure you are choosing a smooth, runny peanut butter that only has two ingredients (peanuts and salt).
If you aren’t a chocolate person you can leave out the chocolate chips.
Prep these muffins for the week! They are a delicious snack on the go.
Store in an airtight container on the counter for about 3-4 days.
- Prep Time: 5 minutes
- Cook Time: 20 minutes
- Category: Dessert
- Method: Baking
- Cuisine: American
Nutrition
- Serving Size: 1 muffin