
Easy Homemade Fresh Milled Flour Polish Pierogi is one of those recipes that just feels like a warm hug from your grandma—even if she wasn’t Polish. This pierogi recipe, made with wholesome fresh milled flour and a creamy potato filling, brings comfort and flavor straight to your kitchen. Whether you grew up pinching dough with family or you’ve never tried making dumplings from scratch before, this step-by-step guide makes it approachable and, dare I say, fun.
With easy ingredients and clear instructions, this recipe proves that delicious doesn’t have to mean difficult. Plus, we’re using real food—no mystery boxes here. If you’re looking for a hearty meal that freezes beautifully and wins over even picky eaters, you’ll love giving these easy homemade fresh milled flour Polish pierogi a try.
Table of Contents
What is Easy Homemade Fresh Milled Flour Polish Pierogi?
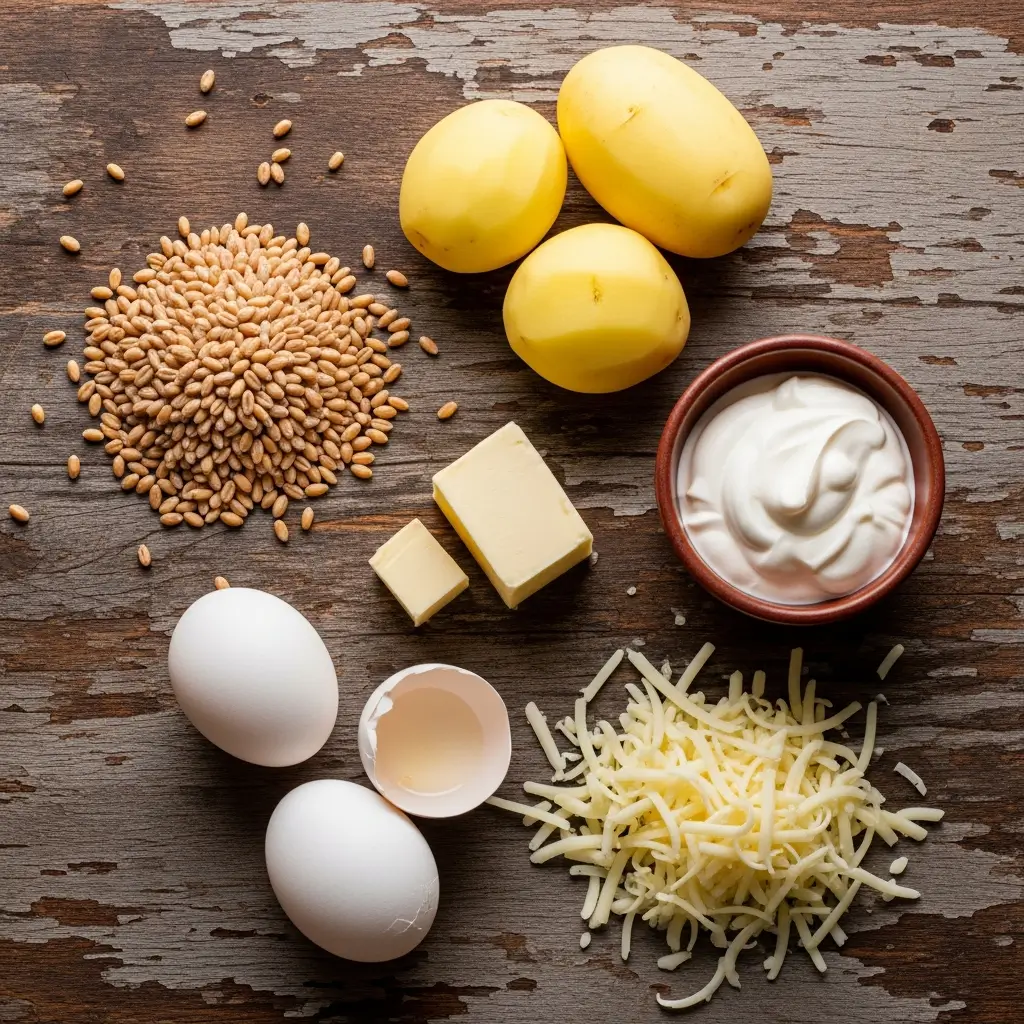
Easy homemade fresh milled flour Polish pierogi are soft, pillowy dumplings stuffed with creamy mashed potatoes, a touch of cheese, and just the right amount of seasoning—all wrapped in a dough made from freshly ground soft white wheat berries. Traditionally rooted in Eastern European cuisine, pierogi are often made for holidays, family gatherings, or just whenever you need a soul-satisfying dinner.
But don’t be fooled—this isn’t some complicated heirloom recipe locked in a babcia’s recipe box. This version is stripped down for everyday home cooks using tools you probably already have (hello, Instant Pot and tortilla press). The use of fresh milled flour not only adds a nutty, richer flavor, but it’s also a little healthier than your average white flour. So yes, these pierogies are old-school in spirit, but thoroughly modern in execution.
Reasons to Try Easy Homemade Fresh Milled Flour Polish Pierogi
If you’ve ever stared down a pack of frozen pierogies at the grocery store and wondered, “Can I do better?” the answer is yes. Making easy homemade fresh milled flour Polish pierogi is not only a fun kitchen project, it’s also shockingly satisfying. For starters, you control every ingredient—no preservatives, no fillers, just real food.
Got picky eaters or dairy preferences? Easy to adjust. Busy schedule? These freeze like a dream and reheat even better. Plus, if you already use a grain mill or are flirting with fresh milled flour, this recipe gives you a great reason to bust it out. Finally, making pierogi from scratch is an awesome way to connect with cultural roots—or just impress your dinner guests. Either way, you’re winning.
Ingredients Needed to Make Easy Homemade Fresh Milled Flour Polish Pierogi
For the Potato Filling
- 1 cup water
- 12 medium gold potatoes
- 1 medium onion, quartered
- 4–5 cloves garlic, peeled
- 8 oz chicken bone broth
- 4 tbsp butter
- 2 oz cream cheese
- 2 oz sour cream
- 1 tsp salt
- 1/8 tsp ground black pepper
- 1 tsp garlic powder
- 1/2 cup shredded cheese
For the Dough
- 2.5 cups soft white wheat berries (yields 4 cups milled flour)
- 1/2 tsp salt
- 4 tbsp melted butter
- 1 egg
- 1 tbsp sour cream
- 1 cup hot water
Instructions to Make Easy Homemade Fresh Milled Flour Polish Pierogi
If you’ve ever wanted to make pierogies from scratch but felt a little intimidated, this step-by-step guide will walk you through the entire process—from prepping the potatoes to sealing that final dumpling—so you can feel confident (and excited!) about what you’re creating. Whether you’re using a tortilla press or just your hands, this tutorial makes it easy, clear, and fun. Ready? Let’s roll.
Step 1: Pressure Cook the Potatoes, Onion, and Garlic
Start your step-by-step journey by grabbing your Instant Pot and lining it with the rack insert (this keeps the potatoes from getting waterlogged). Pour in one cup of water, then add your peeled (or skin-on, your call) gold potatoes, quartered onion, and whole peeled garlic cloves. Gold potatoes work best for a creamy yet fluffy filling, but feel free to check out alternative potato types if needed.
Seal the lid, set the Instant Pot to pressure cook on high for 20 minutes, and go enjoy a few moments of peace. After it’s done, let the pressure release naturally for about 10 minutes before flipping the valve to release the rest. Carefully drain any remaining water and remove the rack.
Tip: If you don’t have an Instant Pot, you can boil everything in a large pot until fork-tender—just be sure to drain well.
Step 2: Mash the Potato Filling to Creamy Perfection
Once your veggies are cooked and cooled slightly, it’s time to mash. Start with the potatoes, onion, and garlic in a large bowl. Now comes the flavor: mix in the chicken bone broth (for richness), butter, cream cheese, sour cream, salt, pepper, garlic powder, and shredded cheese.
Mash it all together until smooth but still a bit textured—think creamy mashed potatoes with attitude. Let the filling cool to room temperature. If you’re prepping ahead, store it in the fridge for up to 2 days.
Want more ways to elevate mashed potato dishes? You’ll love this creamy mashed cauliflower bake for another twist on comfort food.
Step 3: Make the Dough with Fresh Milled Flour
Here’s where the magic of fresh milling comes in. Using a grain mill, grind your soft white wheat berries into flour. You’ll need about 4 cups of flour total (from 2.5 cups of wheat berries). Fresh milled flour adds a nutty richness that store-bought just can’t match.
In a large mixing bowl, combine 1 cup of hot water, 4 cups of flour, the melted butter, sour cream, egg, and salt. Mix until a shaggy dough starts to form—it’ll look messy, but that’s totally normal.
Turn it out onto a floured surface and knead by hand until the dough is soft, elastic, and comes together without sticking too much. Wrap it in plastic and let it rest in the fridge for at least 60 minutes. This step is key: it allows the flour to fully hydrate and makes the dough easier to roll. Learn more about why resting dough matters in baking and cooking.
Step 4: Roll, Shape, and Portion the Dough
Once your dough is rested and ready, divide it into three parts—keep two-thirds covered and cold while you work with one piece at a time. Pinch off about ¾ oz (roughly a large tablespoon) and roll each piece into a ball.
Using a tortilla press (lined with plastic wrap for easy release) or a rolling pin, flatten each dough ball into a 1/8-inch-thick circle, around 3 inches in diameter. If you prefer, you can also roll the dough out in one large sheet and cut circles using a round cookie cutter or drinking glass. Handy and old-school.
Step-by-step shaping is important here, especially if it’s your first time. Don’t rush—slow and steady makes for better seals and less mess.
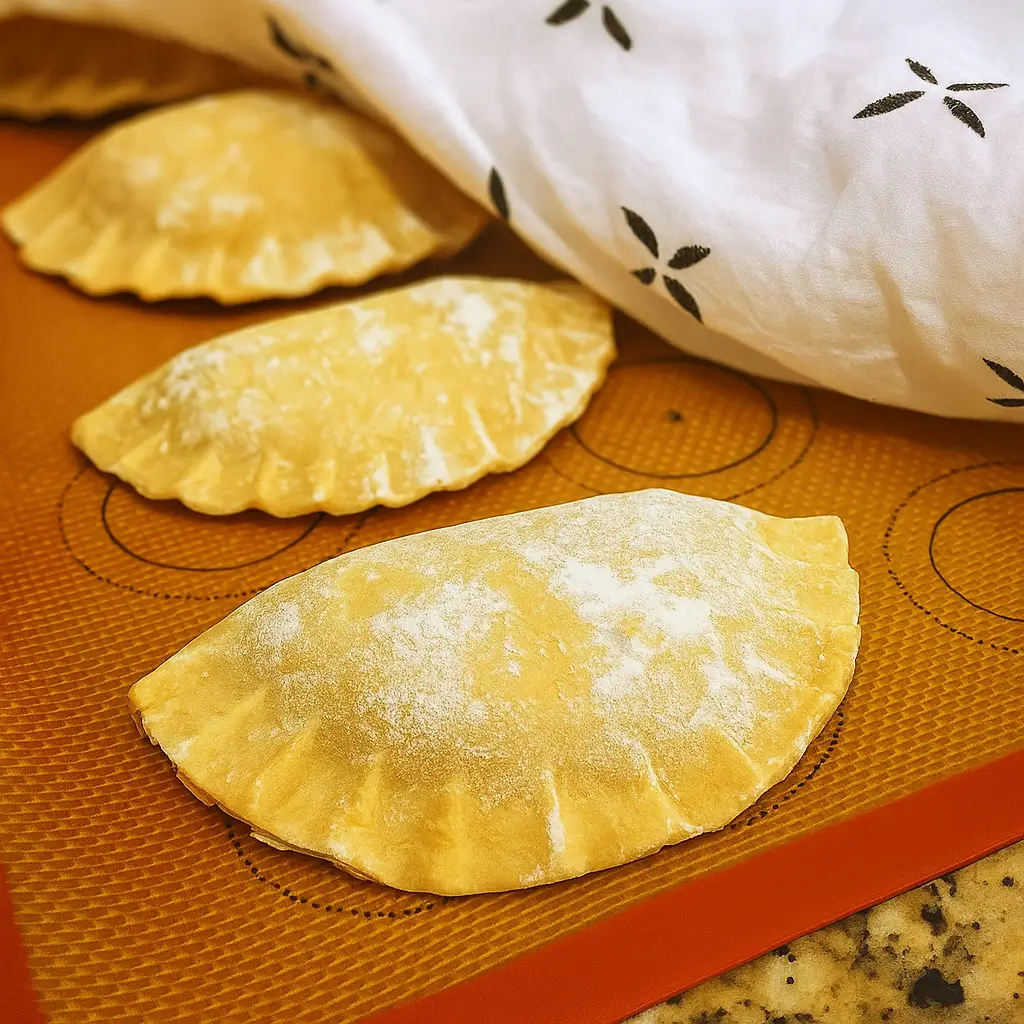
Step 5: Fill and Seal the Pierogies
Place your flattened dough circle into a lightly floured pierogi mold (if you’re using one). Add 1 to 2 teaspoons of the cooled mashed potato filling in the center. Press the mold closed firmly to seal—or if you’re working by hand, fold the dough over into a half-moon shape and press the edges together. Use a fork to crimp for a tighter seal (and cute ridges!).
Set each pierogi onto a parchment-lined or silicone mat-lined tray and cover with a damp towel to prevent drying out while you work on the rest.
Step 6: Boil and (Optional) Pan Fry
Bring a large pot of water to a rolling boil and gently drop in a few pierogies at a time—don’t overcrowd the pot. Boil for 2 to 4 minutes or until they float to the top. That’s their way of waving at you to say, “We’re ready!”
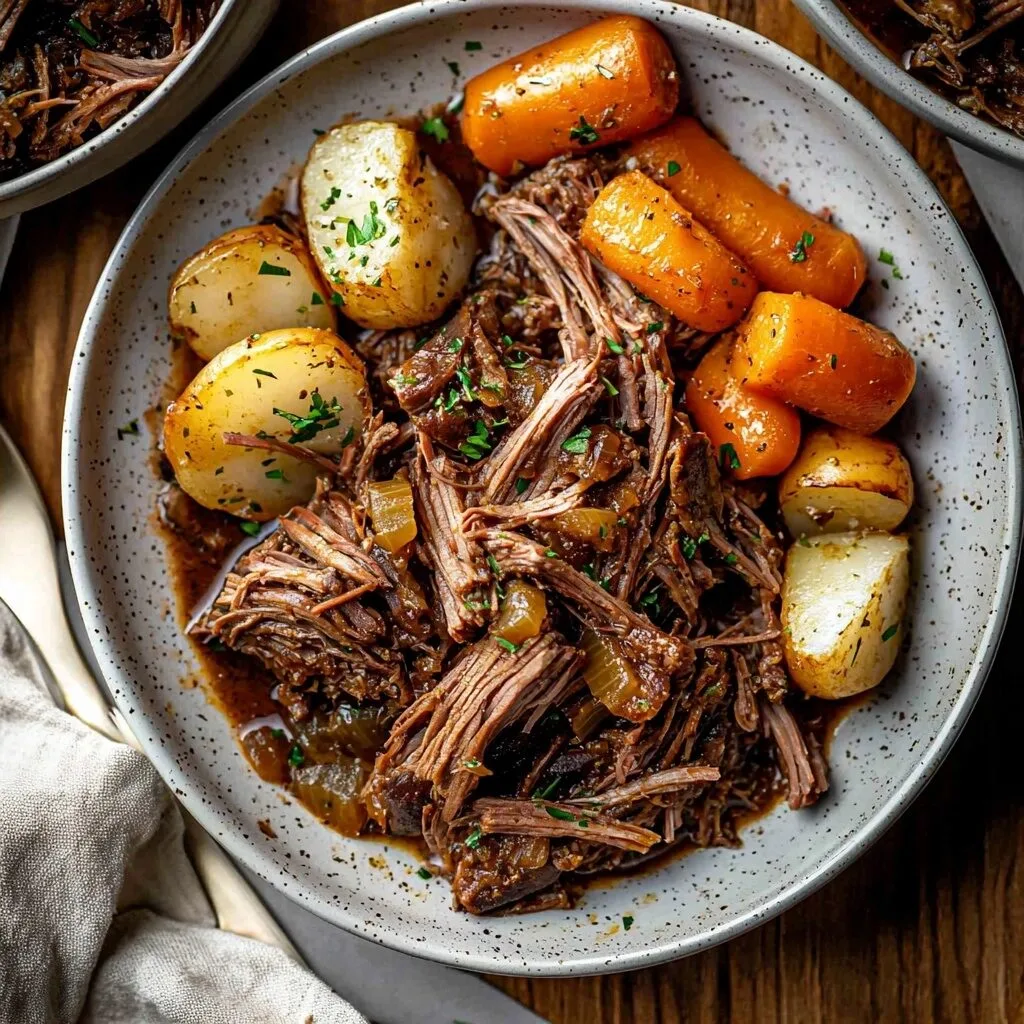
Use a slotted spoon to remove them, shaking off any extra water. From here, you can serve them soft and warm—or take things up a notch by pan frying in butter with fresh herbs until golden and crispy. This extra step adds incredible texture and flavor. If you’re a fan of that buttery finish, you might also enjoy our slow cooker Salisbury steak meatballs that pair beautifully with pan-seared pierogies.
Bonus Tip: Want to freeze for later? Lay uncooked pierogies on a tray to freeze individually, then transfer to a zip-top bag. Boil straight from frozen when ready to eat.
What to Serve with Easy Homemade Fresh Milled Flour Polish Pierogi
These pierogies are stars on their own, but they really shine when paired with the right sides. Try serving them with a creamy vegetable casserole for a cozy combo, or go bold with crispy smashed potato salad for a crunchy contrast. Want to keep it traditional? A dollop of sour cream, sautéed onions, and maybe some bacon crumbles will do the trick. For something sweet to finish, consider baked apple fritters or a cranberry orange crisp. Basically, anything comforting, creamy, or crispy will play well with pierogies.
Key Tips for Making Easy Homemade Fresh Milled Flour Polish Pierogi
Let your dough rest—don’t skip that fridge nap. It helps the fresh milled flour fully hydrate and makes the dough way easier to work with. If you don’t have a tortilla press, a rolling pin and cookie cutter will do just fine. No pierogi mold? No problem. Just fold the dough over and pinch with a fork. If the dough sticks, a little dusting of flour or a plastic wrap barrier works wonders. And here’s a pro tip: keep the pierogies covered with a damp towel while you assemble. They dry out faster than a toddler’s snack cup. Finally, pan-frying is optional, but honestly? It’s magical.
Storage and Reheating Tips for Easy Homemade Fresh Milled Flour Polish Pierogi
Got leftovers? Lucky you. Store cooked pierogies in an airtight container in the fridge for up to 4 days. To freeze, lay them on a baking sheet in a single layer and freeze until solid before transferring to a zip-top bag. They’ll last up to 3 months that way. To reheat, boil frozen pierogies straight from the freezer or toss cooked ones into a skillet with a little butter for that golden finish. Avoid microwaving—they go from pillowy to rubbery faster than you can say “zap.”
FAQs
Can I use store-bought flour instead of fresh milled?
You can, but the flavor and texture might be slightly different. Fresh milled flour has a nutty richness that really elevates the dough.
What’s the best cheese for the filling?
A mild cheddar or Colby Jack works great, but feel free to use whatever you love—or whatever’s in the fridge.
Can I make the dough ahead of time?
Yes! You can make the dough the night before. Just wrap it tight and keep it in the fridge.
Do I need a pierogi mold?
Not at all. It’s handy, but you can shape and crimp these by hand without any fancy tools.
Final Thoughts
Making Easy Homemade Fresh Milled Flour Polish Pierogi might sound like a Sunday project, but it’s one that rewards you big. You get a freezer stocked with comfort food, a kitchen that smells like heaven, and a dinner that tastes like a warm hug. With fresh milled flour in the dough and a dreamy mashed potato filling, these pierogies hit that just-right spot between rustic and refined. Whether you’re feeding kids, hosting friends, or just craving something seriously satisfying, this recipe delivers every time.
Visit our Pinterest for regular slow cooker recipe updates, or join our Facebook discussions where cooking fans exchange their favorite hearty meal ideas.
Print
Easy Homemade Fresh Milled Flour Polish Pierogi
- Total Time: 1 hour 30 minutes
- Yield: 40 Pierogies 1x
Description
Learn to make homemade pierogi using fresh milled flour. This comfort food combines simple ingredients to form delicious dumplings.
Ingredients
Potato Filling
- 1 Cup Water
- 12 Medium Potatoes (we prefer the gold variety)
- 1 Medium Onion, quartered
- 4–5 Cloves Garlic, whole and peeled
- 8oz Chicken Bone Broth
- 4 TBSP Butter
- 2oz Cream Cheese
- 2oz Sour Cream
- 1 tsp Salt
- 1/8 tsp Ground Black Pepper
- 1 tsp Garlic Powder
- 1/2 Cup Shredded Cheese
Dough
- 2.5 Cups (485g) Soft White Wheat Berries (4 cups flour measured)
- 1/2 tsp Salt
- 4 TBSP Butter, melted
- 1 Egg
- 1 TBSP Sour Cream
- 1 Cup Water, hot
Instructions
1. Line Instant Pot with rack insert and add a cup of water.
2. Place washed (and if desired, peeled) potatoes, quartered onions, and peeled garlic into pot.
3. Set to pressure cook on high for 20 minutes.
4. Let naturally release for 10 minutes before opening sealing valve.
5. Drain water and remove rack.
6. Mash potatoes slightly and then add in all other ingredients.
7. Continue mashing until desired consistency.
8. Let cool to room temperature before using in pierogies or store in the refrigerator if not using immediately.
9. Add 1 cup hot water to your mixing bowl.
10. Use a grain mill to grind wheat into a different mixing bowl.
11. Measure 4 cups of flour into hot water.
12. Add the egg, sour cream, and melted butter and mix until a shaggy dough forms.
13. Knead dough by hand until it has come together.
14. Cover with plastic wrap and rest dough in fridge for 60 minutes.
15. Remove 1/3 of the dough at a time (leave the rest covered in the fridge while you work).
16. Weigh out .75oz for each pierogi and roll into balls.
17. Using tortilla press or rolling pin, flatten dough to 1/8″ thickness and about 3″ diameter.
18. Dust dough mold and place dough circle on top.
19. Add 1-2 tsp of mashed potato filling to each round and press dough mold shut to seal pierogies.
20. Place pierogies on silicone mat lined baking trays and cover with a damp towel to prevent drying while you work.
21. Bring a large pot of water to a rolling boil.
22. Boil the pierogies in batches for about 2-4 minutes, or until they float to the top of the water.
23. Remove from water with a slotted spoon.
24. For a crispy golden finish, pan fry the boiled pierogies over medium-high heat in a large skillet with herbs and butter until lightly browned.
Notes
Dough makes about 40 pierogies.
You can roll out dough into one large piece and use a round cookie cutter if that is what you have instead of using a tortilla press.
If you don’t have a pierogi mold you can just fold the dough over the filling to form a half-moon shape and then press the edges together and crimp with a fork for a tight seal.
If using a tortilla press, cover it with plastic wrap or dust well to avoid dough sticking.
Don’t forget to let the dough rest, this helps fully hydrate the dry ingredients.
- Prep Time: 1 hour
- Cook Time: 30 minutes
- Category: Dinner
- Method: Boiling
- Cuisine: Polish
Nutrition
- Serving Size: 1
- Calories: 387
- Sugar: 4g
- Sodium: 558mg
- Fat: 15g
- Saturated Fat: 9g
- Unsaturated Fat: 5g
- Trans Fat: 0g
- Carbohydrates: 54g
- Fiber: 6g
- Protein: 11g
- Cholesterol: 59mg

")