Let’s talk about cheesy chicken wraps. Because if there’s one thing that can save your weeknight dinner slump (or cure that “what-do-we-eat?” panic stare into the fridge), it’s this cheesy, golden, flavor-packed hero. A Cheesy Chicken Wrap brings together the boldness of garlic, the comfort of melty cheese, and the satisfying crunch of a grilled tortilla—all in a neat little hand-held package.
Whether you’re a busy mom juggling soccer practice and laundry or just want something fast but not boring for dinner, this wrap delivers the goods. Plus, it’s ready in 25 minutes. That’s faster than your favorite food delivery app can find your house. Bonus: picky eaters love it. This cheesy chicken wrap is a crave-worthy combo of comfort food and convenience, and trust me, you’ll want to make it again (and again).
Table of Contents
What is a Cheesy Chicken Wrap?
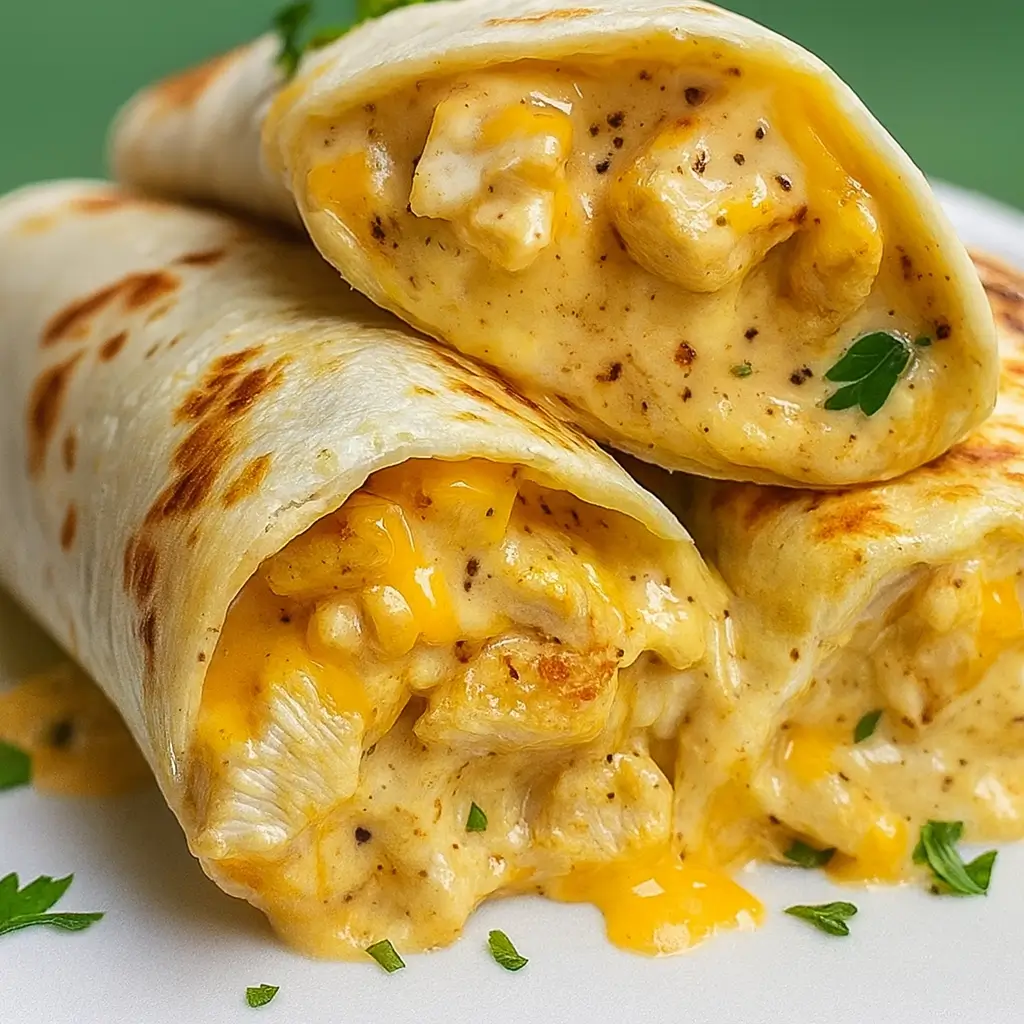
A Cheesy Chicken Wrap is exactly what it sounds like: a glorious mash-up of grilled chicken, gooey cheese, and creamy garlic sauce all bundled up in a warm flour tortilla. It’s a warm hug in wrap form. The chicken is seasoned with pantry staples like paprika and garlic powder (so no need to raid a specialty spice shop), cooked till golden, and then wrapped up with a creamy garlic sauce that makes it feel like you put in way more effort than you actually did.
What makes it stand out? The quick pan-grill at the end—just a couple of minutes in the pan makes the outside crispy while the inside stays juicy and melty. It’s hearty enough for dinner but portable enough for lunch, and let’s be real—this is one of those meals that feels a little indulgent but is secretly easy and wholesome. Plus, it’s endlessly customizable depending on what’s hanging around in your fridge.
Reasons to Try Cheesy Chicken Wrap
First off, if you’re chasing dinner ideas that won’t leave you with a sink full of dishes and a headache, this cheesy chicken wrap is your new best friend. It’s done in under 30 minutes. Seriously. You get juicy, flavorful chicken, creamy garlic sauce, and two types of cheese that melt into pure happiness.
It’s also super adaptable—swap tortillas for lettuce wraps if you’re low-carb or throw in spinach, red onion, or jalapeños to jazz it up. This wrap is ideal for busy weeknights, picky kids, and even lunch meal prep (yes, it reheats well!). Plus, no oven needed—just one pan and a bowl. And if you’re already drooling just thinking about melted cheese oozing out of a crispy tortilla, you’re not alone. This wrap is comfort food without the chaos.
Ingredients Needed to Make Cheesy Chicken Wrap
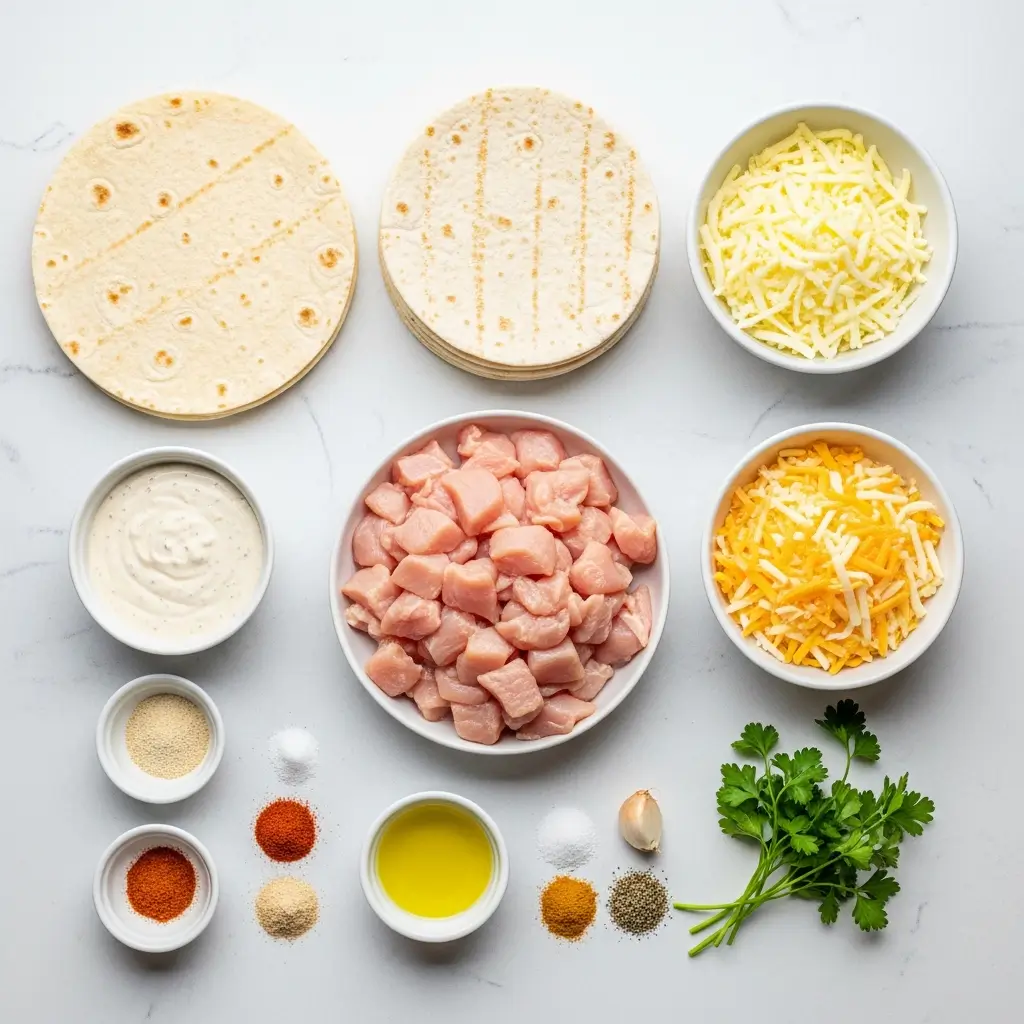
Main Ingredients:
- 2 large chicken breasts, diced
- 4 large flour tortillas
Seasonings & Oil:
- 1 tablespoon olive oil
- 2 teaspoons garlic powder
- 1 teaspoon onion powder
- 1 teaspoon paprika
- Salt and pepper, to taste
Cheese & Sauce:
- 1 cup shredded cheddar cheese
- 1/2 cup shredded mozzarella cheese
- 1/2 cup creamy garlic sauce
Garnish (Optional):
- Fresh parsley, chopped
Instructions to Make Cheesy Chicken Wrap
Making a Cheesy Chicken Wrap at home is simpler than you think. Whether you’re a kitchen newbie or a seasoned home cook, this step-by-step guide will walk you through every part of the process. From seasoning the chicken to achieving that irresistible golden crisp on the outside, here’s how to make it happen.
Step 1: Season the Chicken Like a Pro
Start by placing your diced chicken breasts into a large mixing bowl. Drizzle with 1 tablespoon of olive oil—this helps the seasoning stick and keeps the chicken moist while cooking.
Sprinkle in the seasonings:
- 2 teaspoons garlic powder
- 1 teaspoon onion powder
- 1 teaspoon paprika
- Salt and pepper to taste
Now, give it all a good mix. Use your hands or a spoon to coat each piece evenly. This seasoning combo creates a savory, garlicky base that sets the flavor foundation. If you’re short on paprika or looking to dial up the heat, red pepper flakes or cayenne pepper make excellent substitutions—check out this guide on ingredient swaps for bold flavor in savory dishes.
Step 2: Cook the Chicken to Golden Perfection
Heat a non-stick pan over medium heat. Once it’s hot, add your seasoned chicken. Spread it out in a single layer so each piece gets direct contact with the pan—that’s how you get that golden sear.
Cook for about 6–8 minutes, stirring occasionally. You’ll know it’s done when the chicken is golden brown on the outside and no longer pink inside.
Step by step cooking tip: Avoid overcrowding the pan, or the chicken will steam instead of sear. If needed, cook in batches.
Remove from heat and let the chicken rest for a few minutes. Resting helps the juices redistribute—so every bite is juicy, not dry. If you’re meal prepping, now’s a great time to set aside extra chicken for tomorrow’s quick lunch wrap ideas.
Step 3: Assemble the Wraps with Love (and Cheese)
Lay your flour tortillas out on a clean, flat surface. Spread a generous spoonful (about 2 tablespoons) of creamy garlic sauce across each one. This step locks in flavor and moisture. If you don’t have garlic sauce, you can easily whip up a version by mixing mayo, a dash of lemon juice, and minced garlic.
Next, divide the cooked chicken evenly among the tortillas. Sprinkle each with:
- 1/4 cup shredded cheddar cheese
- 2 tablespoons mozzarella cheese
If you love extra cheese (who doesn’t?), feel free to up the quantity or try alternatives like Monterey Jack or smoked gouda for a fun twist.
Step 4: Fold and Secure Your Wraps
Now it’s time to wrap things up—literally. Fold the sides of the tortilla inward, then roll from the bottom up into a tight burrito-style wrap. Make sure everything is snug so the filling stays inside while grilling.
If you’re new to this, you might find our quick guide on how to fold burritos without leaks helpful for wrapping with confidence.
Step 5: Grill Until Golden and Crispy
Return your non-stick pan to medium heat (no need to add extra oil unless your pan needs it). Place the wraps seam-side down in the pan. Grill each one for about 2–3 minutes per side, or until the tortillas are golden and crisp and the cheese is melted inside.
This final sear turns your wrap from good to unforgettable. The outside becomes crisp and golden while the inside stays melty and flavorful.
Step by step tip: Press gently with a spatula while grilling to encourage even browning and melt the cheese faster.
Step 6: Serve, Slice, and Savor
Once your wraps are grilled, transfer them to a cutting board and let them rest for a minute. Then slice each wrap in half on a diagonal (because we all know food tastes better when it looks good).
Sprinkle with fresh chopped parsley for a pop of color and freshness. Serve immediately while the cheese is still perfectly gooey.
Want to complete your meal? These wraps pair wonderfully with a side of healthy smashed carrots or a bowl of comforting pumpkin and sweet potato soup for a cozy lunch or dinner.
What to Serve with Cheesy Chicken Wrap
You’ve got the main event wrapped up (literally), so now let’s round things out. These cheesy chicken wraps pair beautifully with a side of roasted veggies, a crunchy coleslaw, or even a quick green salad if you’re feeling virtuous. Want to go all in on comfort food? Serve them with crispy smashed potato salad or a creamy dip like ranch or chipotle mayo. For soup lovers, these wraps are pure heaven next to a steamy bowl of cozy chickpea tomato soup. You could even chop them up and serve over rice for a deconstructed bowl vibe. Bottom line? These wraps play well with almost anything on the dinner table.
Key Tips for Making Cheesy Chicken Wrap
- Preheat your pan before adding the wraps—this helps get that golden crispy finish without drying things out.
- Don’t overfill your tortillas. It’s tempting (cheese lovers, I see you), but too much stuffing makes them hard to flip.
- Let the chicken rest for a few minutes before assembling. This keeps the juices in and avoids a soggy wrap.
- Switch up the cheese if cheddar-mozzarella isn’t your thing. Pepper Jack or smoked gouda bring next-level flavor.
- Add a spicy kick with red pepper flakes or hot sauce if your crowd can handle the heat.
Storage and Reheating Tips for Cheesy Chicken Wrap
Made too many? First, congratulations on planning ahead. Wrap any extras tightly in foil or place them in an airtight container. Store in the fridge for up to 3 days. When you’re ready to reheat, pop them in a skillet for a few minutes per side to re-crisp, or use the air fryer for a faster, crunchier finish. Microwave works in a pinch, but you’ll lose that crispy tortilla. Want to freeze them? Totally doable—just skip the fresh parsley garnish and freeze individually. Reheat straight from frozen in a pan or toaster oven for best texture.
FAQs
Can I use rotisserie chicken?
Absolutely. Just skip the seasoning and cooking step, and toss your shredded rotisserie in the garlic sauce before assembling.
What’s a good substitute for garlic sauce?
Try ranch, Caesar, or even a mix of sour cream and garlic powder in a pinch.
Can I make this wrap low-carb?
You bet. Use low-carb tortillas or go for lettuce wraps for a lighter take.
Can I make these ahead for lunch?
Yes! Wrap them tightly and store in the fridge. Reheat in a skillet or microwave just before eating.
Final Thoughts
Cheesy Chicken Wraps are the weeknight MVPs you didn’t know you needed. Packed with flavor, super quick to make, and totally flexible to fit your cravings or pantry situation, they’re a lifesaver for busy home cooks. And let’s face it—there’s something wildly satisfying about biting into that crispy tortilla and getting a mouthful of juicy chicken and melty cheese. Whether you’re feeding hungry kids, meal prepping for the week, or just want something darn good without a ton of effort, this cheesy chicken wrap is here for you.
Visit our Pinterest for regular slow cooker recipe updates, or join our Facebook discussions where cooking fans exchange their favorite hearty meal ideas.
Print
Cheesy Chicken Wrap | Easy Comfort Food in 25 Minutes
- Total Time: 25 minutes
- Yield: 4 servings 1x
Description
Golden chicken wrapped in crispy tortillas with melted cheese and creamy garlic sauce. Ready in 25 minutes for an easy meal.
Ingredients
- 2 large chicken breasts, diced
- 4 large flour tortillas
- 1 tablespoon olive oil
- 2 teaspoons garlic powder
- 1 teaspoon onion powder
- 1 teaspoon paprika
- Salt and pepper, to taste
- 1 cup shredded cheddar cheese
- 1/2 cup shredded mozzarella cheese
- 1/2 cup creamy garlic sauce
- Fresh parsley, chopped
Instructions
1. In a bowl, combine the diced chicken with olive oil, garlic powder, onion powder, paprika, salt, and pepper, ensuring the chicken is evenly coated with the seasonings.
2. Heat a non-stick pan over medium heat. Add the seasoned chicken to the pan and cook for about 6-8 minutes, stirring occasionally, until the chicken is golden and fully cooked through. Remove from heat and let cool slightly.
3. Lay the tortillas out on a flat surface. Spread a layer of creamy garlic sauce over each tortilla. Evenly distribute the cooked chicken on top of each tortilla. Sprinkle with shredded cheddar and mozzarella cheese.
4. Fold the tortillas over the filling, creating a wrap. In the same non-stick pan, grill the folded wraps for 2-3 minutes on each side, or until the cheese is melted and the tortillas are golden and crispy.
5. Remove from the pan and cut each wrap in half. Garnish with freshly chopped parsley, if desired, and serve immediately.
Notes
Great served with a side of fresh salad or garlic dipping sauce.
Add red pepper flakes to the chicken seasoning for a spicier wrap.
Use whole wheat tortillas for a slightly healthier twist.
Wraps can be prepped ahead and grilled just before serving.
- Prep Time: 10 minutes
- Cook Time: 15 minutes
- Category: Main Dishes
- Method: Sautéing
- Cuisine: American
Nutrition
- Serving Size: 1 wrap
- Calories: 400
- Sugar: 2g
- Sodium: 620mg
- Fat: 18g
- Saturated Fat: 8g
- Unsaturated Fat: 9g
- Trans Fat: 0g
- Carbohydrates: 30g
- Fiber: 2g
- Protein: 30g
- Cholesterol: 85mg
")