
Looking for the perfect strawberry preserves recipe? Making your own strawberry preserves at home is easier than you might think, and the results are simply irresistible. This classic recipe captures the vibrant flavor of fresh strawberries, turning them into a sweet, chunky spread that’s perfect for everything from breakfast toast to decadent desserts.
Homemade strawberry preserves aren’t just delicious—they’re also free from artificial additives, giving you full control over the ingredients and sweetness. Whether you’re a beginner or an experienced cook, this guide will walk you through the process step by step, offering tips and variations to make your preserves truly unique. With just a few simple tools and high-quality ingredients, you’ll create a timeless treat that’s as rewarding to make as it is to enjoy.
Let’s dive into this strawberry preserves recipe and discover how to bring the taste of summer into every jar!
Table of Contents
Introduction to Strawberry Preserves
What Are Strawberry Preserves?
Strawberry preserves are a type of fruit spread made with chunks or whole pieces of strawberries, sugar, and sometimes lemon juice. Unlike jam, which has a smoother texture, preserves are known for their chunky consistency and bold, fruity taste. This texture gives them a rustic, homemade feel that many people love.
Preserves aren’t just tasty; they’re also versatile. They pair perfectly with everything from freshly baked bread to desserts like cheesecakes and tarts. Plus, they’re an excellent way to reduce food waste by preserving the abundance of strawberries during peak season.
Strawberry Preserves vs. Strawberry Jam: Key Differences
Ever wondered what sets strawberry preserves apart from strawberry jam? It all comes down to texture. Jam is made by mashing the fruit during cooking, resulting in a smoother spread. On the other hand, preserves retain larger pieces of the fruit, making them chunkier and often sweeter.
Another difference lies in the preparation process. Preserves typically require less cooking time to maintain the fruit’s integrity, while jam is cooked longer to achieve its smooth consistency. Understanding this distinction can help you choose the right spread for your needs.
Why Make Your Own Preserves?
Homemade strawberry preserves offer several benefits. First, you have complete control over the ingredients. Store-bought options often contain additives and artificial flavors, but making them at home ensures a natural, wholesome treat.
Second, it’s an excellent way to celebrate strawberry season. Fresh strawberries are more flavorful than their frozen counterparts, and preserving them locks in their peak-season goodness.
Lastly, the satisfaction of crafting something with your own hands is unbeatable. Plus, it’s a cost-effective way to enjoy gourmet-quality preserves without the hefty price tag.
Essential Ingredients for Strawberry Preserves
Selecting the Best Strawberries
When it comes to making a strawberry preserves recipe, the quality of your strawberries is everything. Always choose ripe, fresh strawberries with a bright red color and firm texture. Avoid overripe or bruised fruit, as these can alter the consistency of your preserves. Local and seasonal strawberries often have the most robust flavor, so visit a farmer’s market if possible. If fresh strawberries aren’t available, frozen ones can work in a pinch, but ensure they are unsweetened for better results.
The Role of Sugar in Preserves
Sugar isn’t just for sweetness—it’s a crucial ingredient in preserving fruit. It helps prevent spoilage, enhances the natural flavor of the strawberries, and gives the preserves their rich, glossy texture. Granulated white sugar is the most common choice for a strawberry preserves recipe. You can experiment with alternatives like cane sugar, but this might slightly alter the texture or shelf life. A standard ratio for preserves is one part sugar to one part fruit, but you can adjust this based on personal preference.
Adding Lemon Juice: The Key to Flavor and Safety
Lemon juice plays an essential role in any strawberry preserves recipe. It not only enhances the flavor but also helps in preserving by maintaining a low pH, which prevents bacterial growth. Freshly squeezed lemon juice is ideal, as it has a more vibrant taste compared to bottled versions. For added depth, consider using Meyer lemons for their slightly sweeter profile.
Tools and Equipment You’ll Need
Essential Kitchen Tools for Making Preserves
To create a successful batch of strawberry preserves, having the right tools is vital. Start with a heavy-bottomed pot or saucepan, which ensures even heat distribution and prevents scorching. A wooden spoon or silicone spatula is perfect for stirring without damaging the pot’s surface. You’ll also need a ladle for transferring the preserves into jars and a food scale for accurate ingredient measurements.
Canning Equipment: Is It Necessary?
While it’s possible to store your preserves in the fridge without canning, proper canning equipment will significantly extend the shelf life. A canning kit usually includes jars, lids, a jar lifter, and a canning funnel. These tools ensure that your preserves are sealed airtight, preventing contamination. For beginners, starting with a water bath canner is an affordable and straightforward option.
Step-by-Step Strawberry Preserves Recipe
Preparation: Cleaning and Prepping the Strawberries
The first step to a successful strawberry preserves recipe is properly preparing your strawberries. Begin by rinsing the strawberries thoroughly under cold water to remove any dirt or debris. Next, remove the green stems using a paring knife or a strawberry huller. Afterward, inspect the strawberries for any bruised or overly soft spots, cutting them away to ensure only the freshest pieces are used.
For chunkier preserves, slice the strawberries into halves or quarters. Alternatively, if you prefer a smoother texture, lightly mash the strawberries with a fork or potato masher. This step ensures the preserves cook evenly, which is essential for achieving the perfect consistency.
Cooking the Preserves: Techniques and Tips
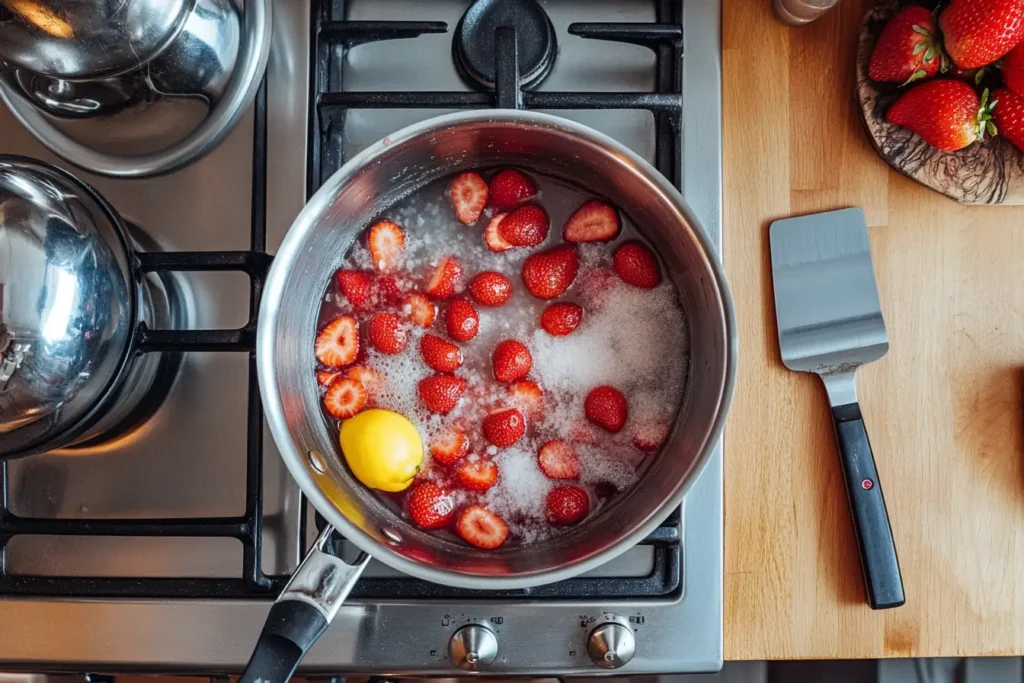
To start, combine your prepped strawberries and sugar in a large, heavy-bottomed pot. Allow the mixture to sit for about 30 minutes. This resting period helps draw out the strawberries’ natural juices, creating a flavorful syrup.
Next, add lemon juice to the pot, which not only balances the sweetness but also helps the preserves set properly. Turn the heat to medium and bring the mixture to a gentle boil, stirring frequently to prevent sticking. Skim off any foam that forms on the surface to keep your preserves clear and glossy.
Cook the mixture for 20–30 minutes, or until it thickens to your desired consistency. To test, place a small spoonful on a chilled plate and run your finger through it—if it holds its shape, it’s ready!
Sterilizing and Storing the Preserves
While your preserves are cooking, prepare your jars. Sterilizing them is key to avoiding contamination. Wash the jars with soap and hot water, then submerge them in boiling water for at least 10 minutes.
Once the preserves are ready, use a canning funnel to transfer the hot mixture into the jars, leaving about ¼ inch of space at the top. Seal the jars with their lids and process them in a water bath for 10 minutes if you plan to store them long-term. If not, simply allow the jars to cool and store them in the refrigerator.
Troubleshooting Common Issues
Even with the best techniques, making preserves can sometimes lead to challenges. If your preserves seem too runny, try cooking them for an additional 5–10 minutes to thicken. On the other hand, if they’re too thick, you can loosen them with a small amount of water or fruit juice.
Foam on the surface is normal but can cloud your preserves. Skim it off during cooking to ensure your strawberry preserves recipe looks as good as it tastes.
Variations and Creative Additions
Adding Flavors: Vanilla, Mint, and More
While a classic strawberry preserves recipe is delicious on its own, experimenting with flavors can add a unique twist. For a subtle floral note, consider adding a splash of vanilla extract or a split vanilla bean during cooking. Alternatively, try incorporating a few sprigs of fresh mint or basil for a refreshing, herbaceous touch.
For those who enjoy a hint of warmth, a pinch of cinnamon or a dash of ground ginger can complement the strawberries beautifully. These simple additions can elevate your preserves into something truly special.
Mixing Fruits for Unique Preserves
Adding other fruits to your preserves is another great way to create unique flavors. Raspberries, blueberries, or blackberries pair wonderfully with strawberries, creating a vibrant mixed berry preserve.
If you’re feeling adventurous, experiment with tropical fruits like mango or pineapple to add an exotic twist. Simply dice them into small pieces and cook them with the strawberries, adjusting the sugar and lemon juice as needed to balance the flavors.
For more delicious recipes, consider checking out other articles on First Tasting, where you can explore a variety of culinary inspirations.
Serving Suggestions and Storage Tips
Ways to Use Strawberry Preserves
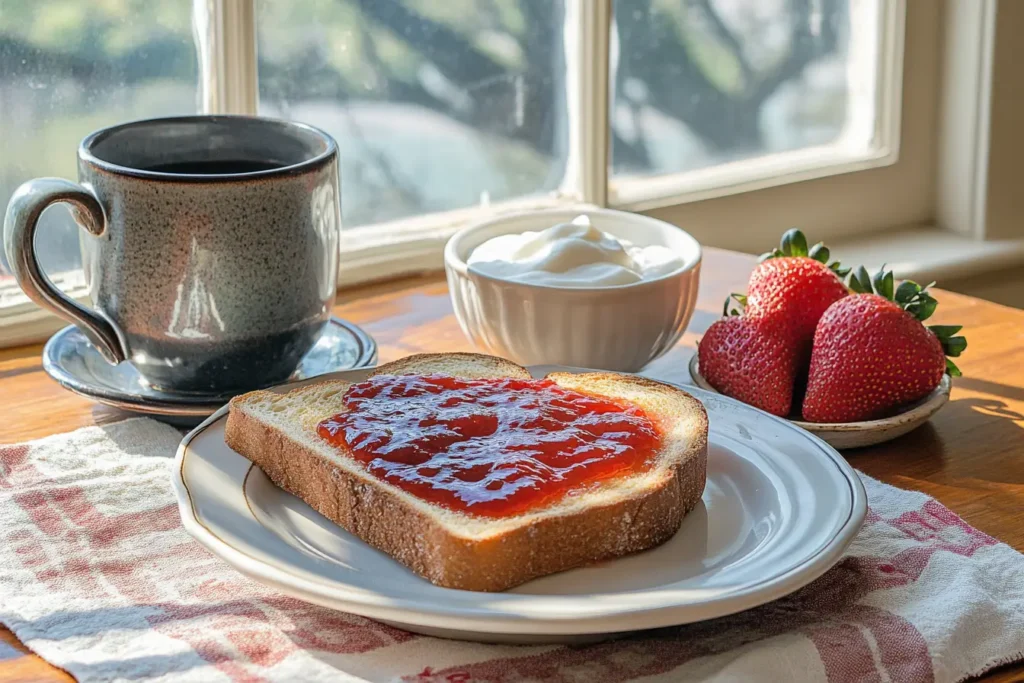
A delicious strawberry preserves recipe is versatile and can enhance countless dishes. Spread it over warm, buttered toast for a classic breakfast or use it as a topping for pancakes and waffles. You can also stir a spoonful into plain yogurt or oatmeal for a touch of natural sweetness.
For dessert lovers, strawberry preserves work wonders as a filling for cakes, tarts, or thumbprint cookies. Additionally, they pair beautifully with savory dishes. Serve them alongside a cheese platter for a mix of sweet and salty or as a glaze for roasted meats like pork or chicken. The possibilities are endless when you have a jar of homemade preserves in your kitchen.
How to Store Your Preserves Properly
Proper storage is essential to enjoy your strawberry preserves recipe for as long as possible. If you’ve gone through the canning process, store the sealed jars in a cool, dark place, like a pantry, where they can last up to a year.
Once a jar is opened, keep it in the refrigerator and use it within 2–3 weeks to ensure freshness. Be sure to use a clean spoon each time to prevent introducing bacteria. If you skipped canning, refrigerate the preserves immediately and consume them within a month.
Shelf Life of Homemade Strawberry Preserves
The shelf life of your preserves depends on how they’re stored. Properly canned preserves can remain safe and delicious for up to 12 months, while refrigerated batches should be enjoyed much sooner. Always check for signs of spoilage, like mold, an off smell, or discoloration, before eating.
FAQs
What Is the Difference Between Strawberry Jam and Strawberry Preserves?
While both are made with strawberries and sugar, their textures set them apart. Jam is smooth because the fruit is crushed or pureed, while a strawberry preserves recipe keeps the fruit in chunks, creating a chunky and rustic texture.
How Long Does Homemade Strawberry Preserve Last?
If canned properly, strawberry preserves can last up to a year when stored in a pantry. Once opened, keep them refrigerated and consume within 2–3 weeks for the best flavor and quality.
What Is the White Stuff in Strawberry Preserves?
The white layer sometimes seen in preserves is typically sugar crystals or natural fruit pectin. It’s harmless but can be avoided by ensuring the sugar is fully dissolved during cooking. If it concerns you, simply stir it in or skim it off.
Why Add Lemon Juice When Making Strawberry Preserves?
Lemon juice serves two important roles. First, it balances the sweetness of the preserves with acidity, enhancing the flavor. Second, it lowers the pH of the mixture, which helps the preserves set properly and makes them safe for storage.
Conclusion
Making a strawberry preserves recipe at home is a delightful experience that combines creativity, tradition, and flavor. It’s not just about the end product; it’s about the process—the aroma of simmering strawberries, the satisfaction of filling jars with your creation, and the joy of sharing it with loved ones. Homemade preserves allow you to capture the essence of fresh strawberries at their peak, ensuring a taste that’s richer and more vibrant than anything store-bought.
One of the greatest advantages of crafting your own strawberry preserves is control over the ingredients. Unlike many commercial options that contain artificial preservatives, homemade preserves are pure, simple, and customizable. Whether you prefer a classic recipe or want to experiment with flavors like vanilla or mint, the choice is entirely yours. Additionally, you can adjust the sugar content to suit your taste, making it a healthier option for your family.
Beyond their delightful taste, strawberry preserves are incredibly versatile. From breakfast to dinner, they elevate any meal. Spread them on toast, drizzle them over desserts, or use them as a glaze for savory dishes. Having a jar of preserves in your pantry opens the door to countless culinary possibilities.
Moreover, the act of preserving strawberries is deeply rewarding. It’s an opportunity to connect with a time-honored tradition, learn new skills, and create something that can be enjoyed long after strawberry season has ended. For those who enjoy gifting homemade treats, a beautifully labeled jar of preserves is a heartfelt and personal way to show someone you care.
As you’ve seen throughout this guide, making preserves doesn’t require advanced culinary skills or fancy equipment. With just a few simple tools and high-quality ingredients, you can create a delicious, long-lasting treat. By following the step-by-step process, troubleshooting common issues, and exploring creative variations, you’ll gain confidence and master the art of preserving.
Whether you’re a seasoned home cook or trying your hand at preserves for the first time, this strawberry preserves recipe is an excellent starting point. So, gather your strawberries, grab your jars, and get started on a journey that’s as fun and fulfilling as it is delicious. Trust us, there’s nothing quite like spreading a dollop of your own homemade strawberry preserves onto a slice of warm bread—it’s a little taste of happiness in every bite.
Dernière mise à jour : 25 January 2025